1. Printing Terminologies

Aqueous coating: a fast-drying, water-based, protective coating which is applied in-line on press to attain a selection of finishes, Dull, Satin and Gloss. Improves durability and gloss.
Basis weight: Weight in pounds of a ream of paper cut to the basic size for its grade.
Bind: To fasten sheets or signatures with wire, thread, glue, or by other means.
Bindery: The finishing department of a print shop or firm specializing in finishing printed products. Product is cut from the parent sheet. Any number of functions can be done at this stage such as folding, die-cutting, gluing, drilling, shrink wrapping, padding, stitching, or round cornering.
Blanket: The thick rubber mat on a printing press that transfers ink from the plate to paper.
Coating tower: A special unit at the end of the press used to apply Aqueous and UV coatings.
Color bar: A quality control term regarding the spots of ink color on the tail of a sheet.
Densitometer: A quality control device to measure the density of printing ink.
Density: The degree of color or darkness of an image or photograph. The Ink film thickness of any given color.
Dot: An element of halftones. Using a loupe you will see that printed pictures are made of many dots.
Dot gain or spread: A term used to explain the difference in size between the dot on the printing plate vs the paper.
Draw down: A sample of ink and paper used to evaluate ink colors.
Emboss: Pressing an image into paper so that it will create a raised relief.
Emulsion: Light sensitive coating found on printing plates. The emulsion that is imaged by the plate setter becomes permanent and will attract ink. The rest of the emulsion washes off in the plate processor.
Foil stamping: Using a die to place a metallic or pigmented image on paper.
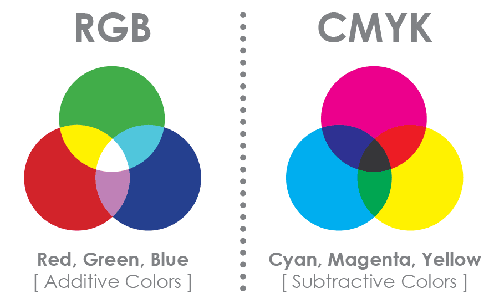
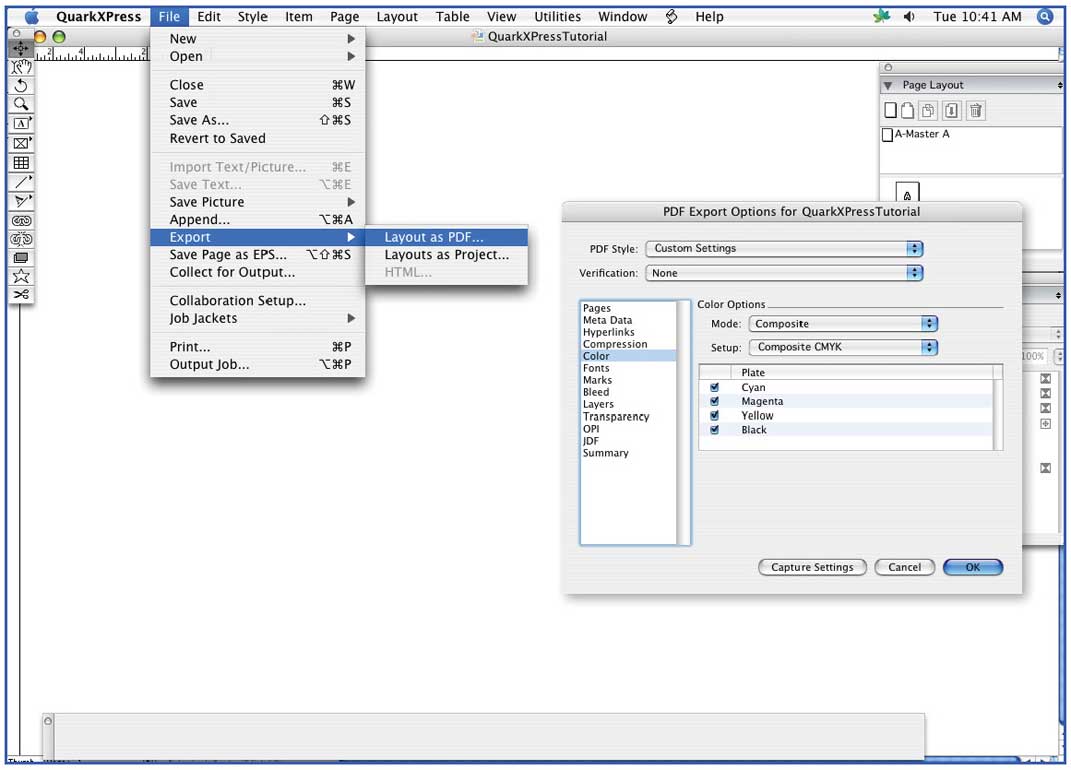
4-color-process: The process of combining four basic colors to create a printed color picture or colors composed from the basic four colors. Cyan, Magenta, Yellow, and Black.
Grain: The direction in which the paper fiber lies.
Grippers: The metal fingers on a printing press that holds the paper as it passes through the press.
Halftone: Converting a continuous tone to dots for printing. Where continuous tone imagery contains an infinite range of colors or greys, the halftone process reduces visual reproductions to a binary
image that is printed with only one color of ink.
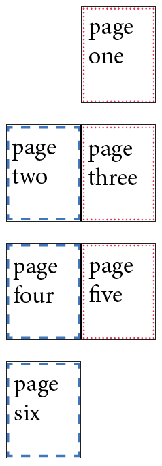
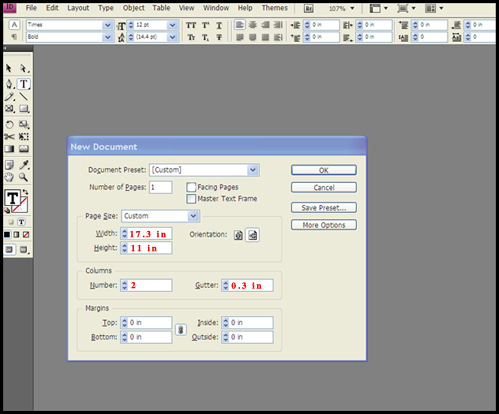
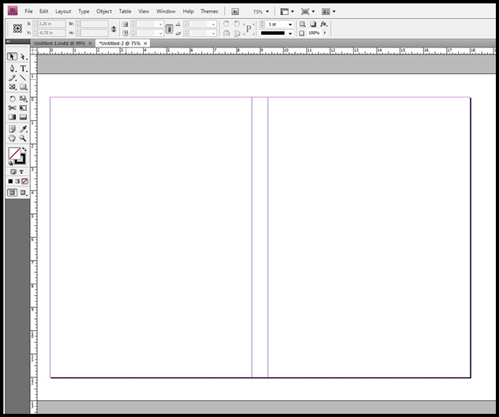
Imposition: One of the fundamental steps in the prepress printing process. It consists in the arrangement of the printed product’s pages on the printer’s sheet, in order to obtain faster printing, simplified binding and no waste of paper.
Impression: Putting an image on paper. The printing plate transfers the image to the printing blanket. When paper is pressed against the blanket, ink is transferred to the paper.
Imprint: Adding copy to a previously printed page.
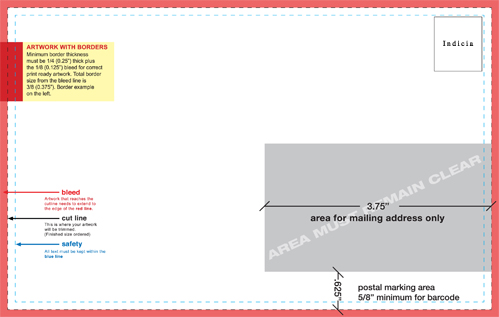
Indicia: Postal information place on a printed product.
Ink fountain: The reservoir on a printing press that holds the ink. A series of ink keys allows the press operator to meter the proper amount of ink into the roller train.
Ink Jet: A type of computer printer that reproduces a digital image by propelling variably sized droplets of ink onto a page. In our mailroom, Ink jet technology is used to print variable data fields onto a mail piece from a mail list. Name, address, city, state, zip code, barcode and indicia are different on each piece as it passes though the machine.
Lines per inch: The number of rows of dots per inch in a halftone.
Loupe: A magnifying glass used to review a printed image, plate and position film.
Make-ready: All the activities required to prepare a press for printing. Loading paper, adjusting the press for the sheet size, mounting the plates on the press, filling the ink fountains.
Micrometer: Instrument used to measure the thickness of different papers.
Moiré: Occurs when screen angles are wrong causing odd patterns in photographs.
Offsetting: An unpleasant happening when the images of freshly printed sheets transfer images to each other.
Offset paper: Term for uncoated book paper.
Ok sheet: Final approved sheet before production begins.
Opacity: The amount of show-through on a printed sheet. The more opacity or the thicker the paper the less show-through. (The thicker/heavier the paper the higher the cost.)
Pantone Matching System: A system of formulated ink colors used for communicating color.
Plate setter: A device used to expose metal plates directly from digital files. Contains thermal lasers to write the image to the heat sensitive emulsion on a printing plate.
Printing Plate: A printing plate is the metal sheet that carries the image being printed on a printing press.
Press check: A press check is when a client, designer, or production manager, visits the printing press and checks the printed sheets as they come off the machine. Usually, these sheets are signed off
by the client and used as proofs to color match the rest of the printed job
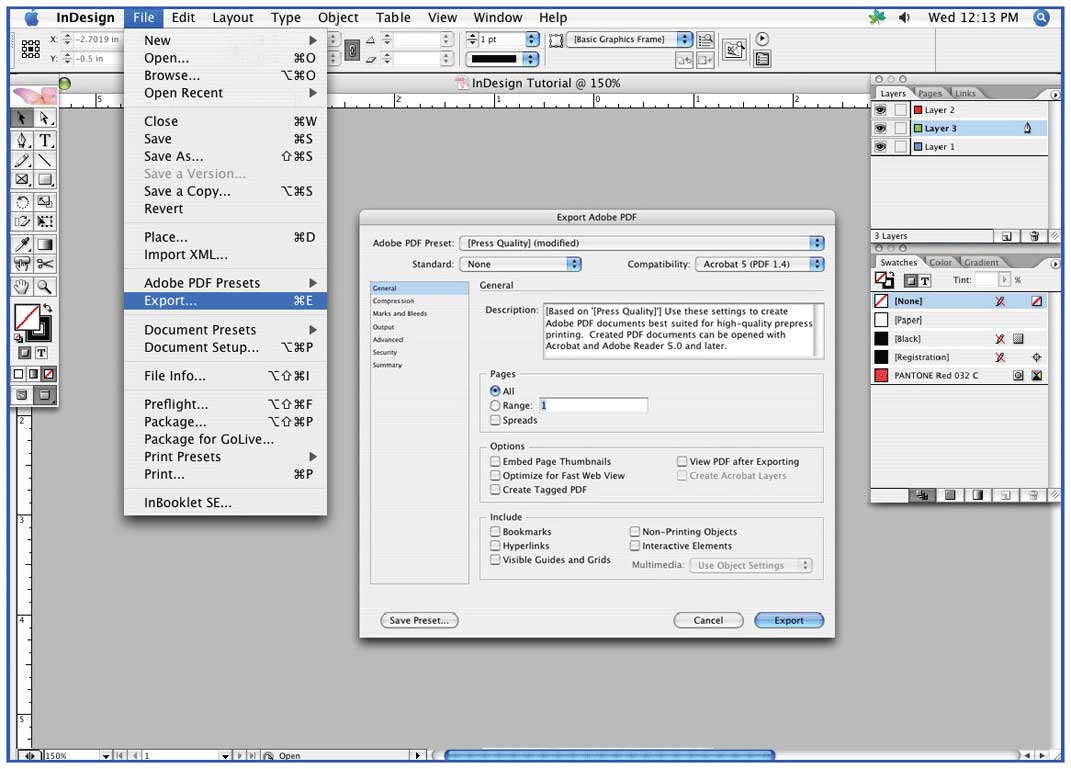
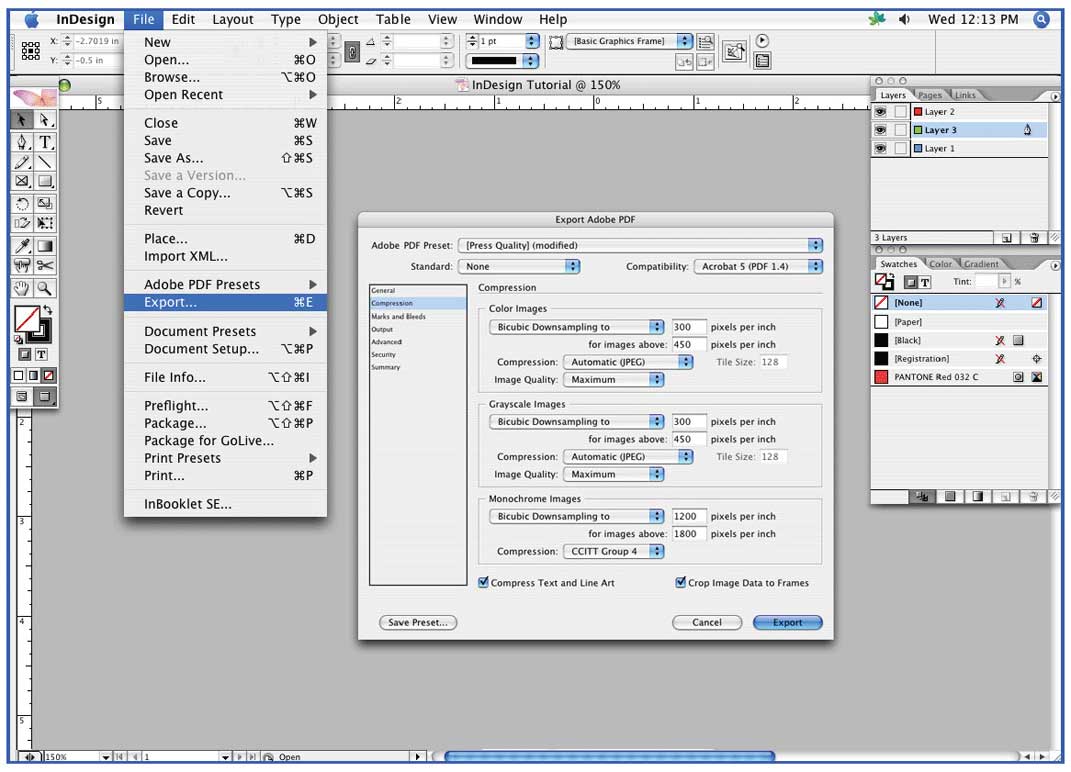
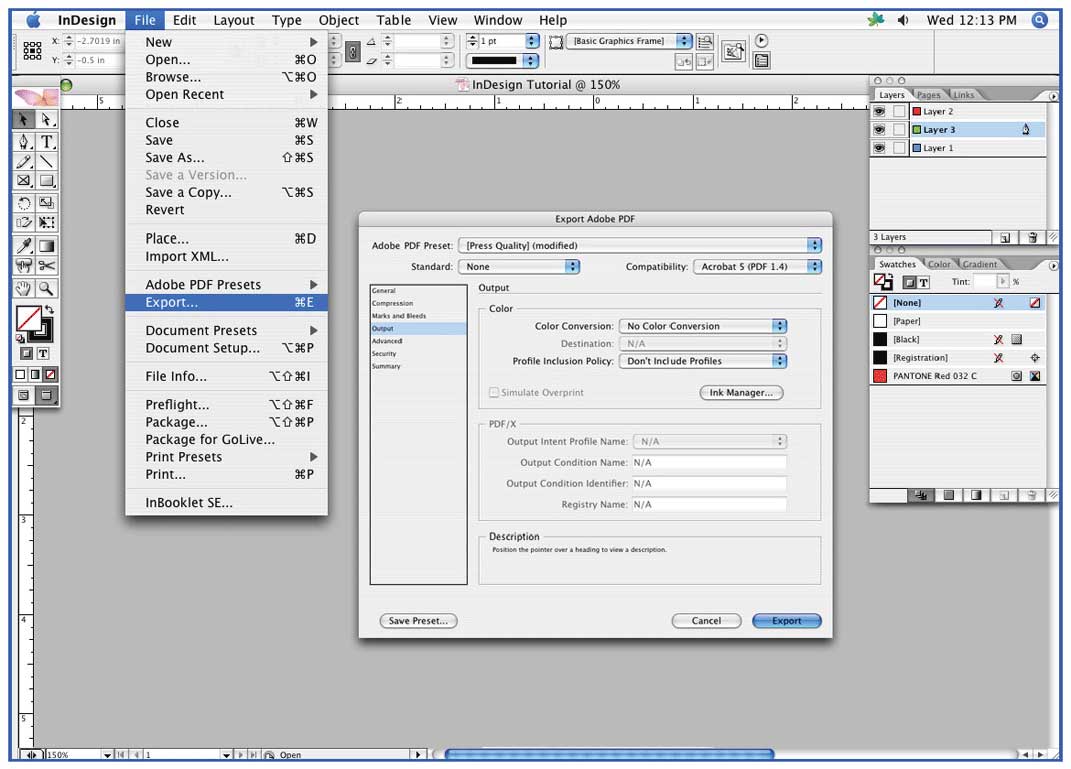
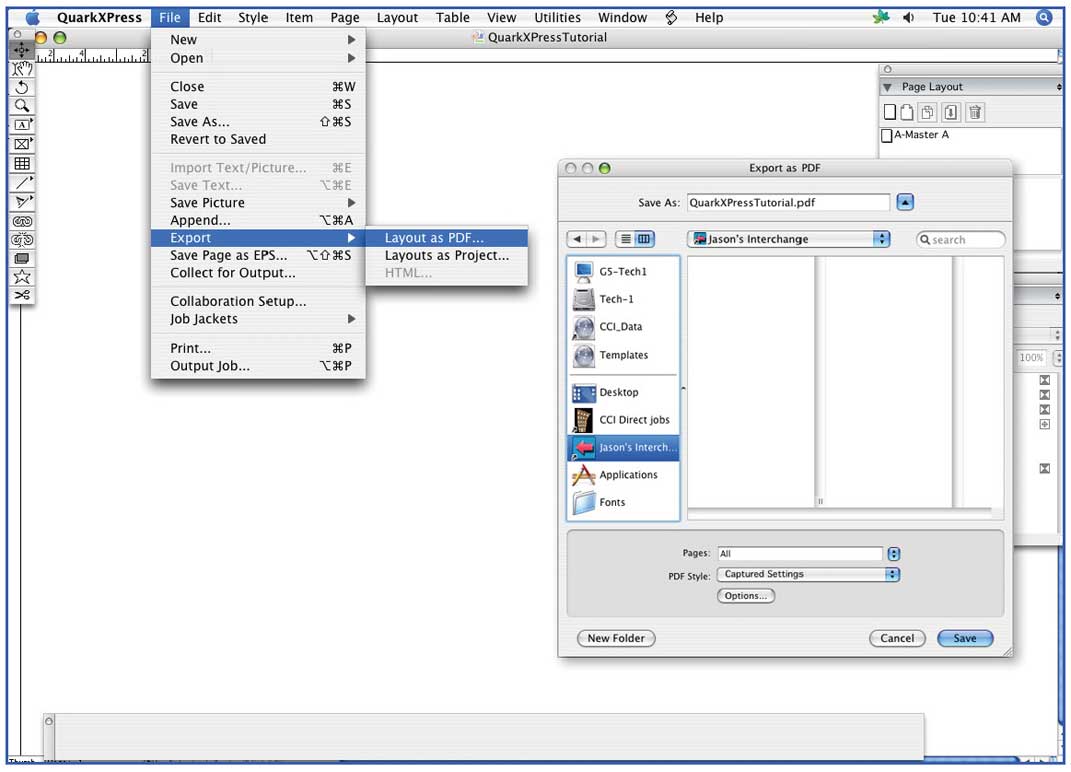
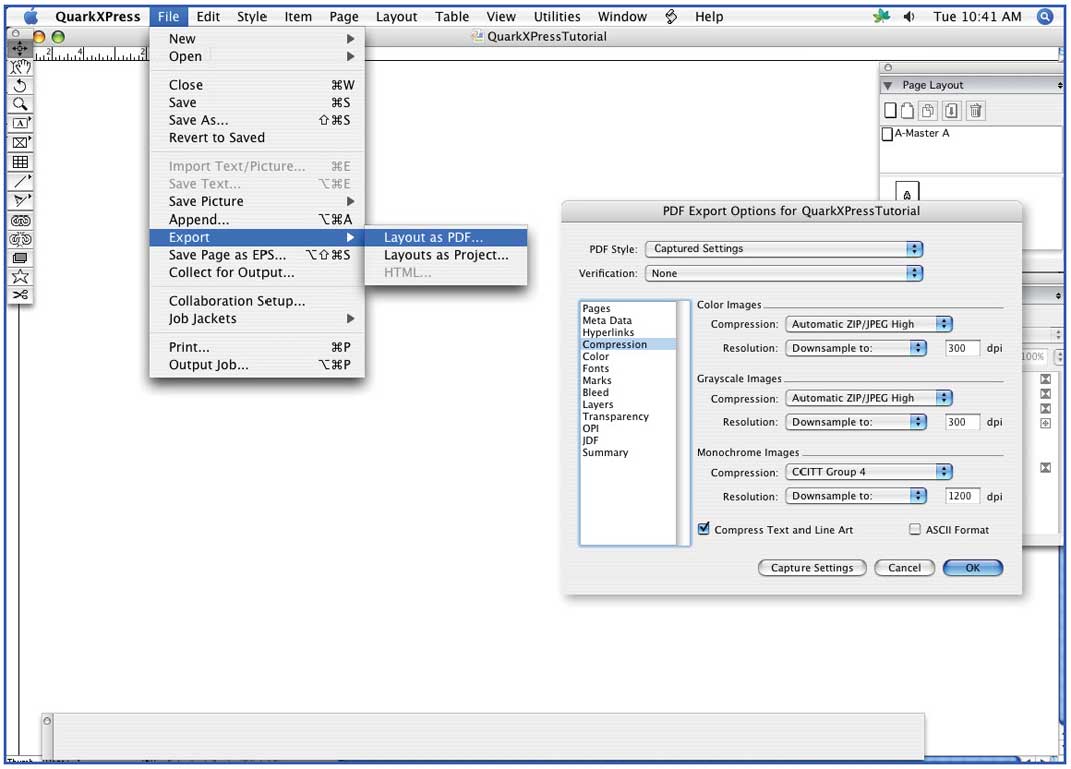
Prepress: All of the activities required to prepare a job for the plate making process. The adjustment of images and text and the creation of a high quality print file. The form of delivery from the customer is usually electronic, either a PDF or native files created from such programs as Adobe InDesign or QuarkXPress.
Proof: Two forms of proofs are usually shown. A dylux which has all of the finishing techniques done to it such as folding or stitching. It is an exact mock up of the finished product. Epson color proofs
are left flat so the customer can view the color. Once the proofs are signed by the customer, it can proceed into print production.
Register: To position print in the proper position in relation to the edge of the sheet and to other printing on the same sheet.
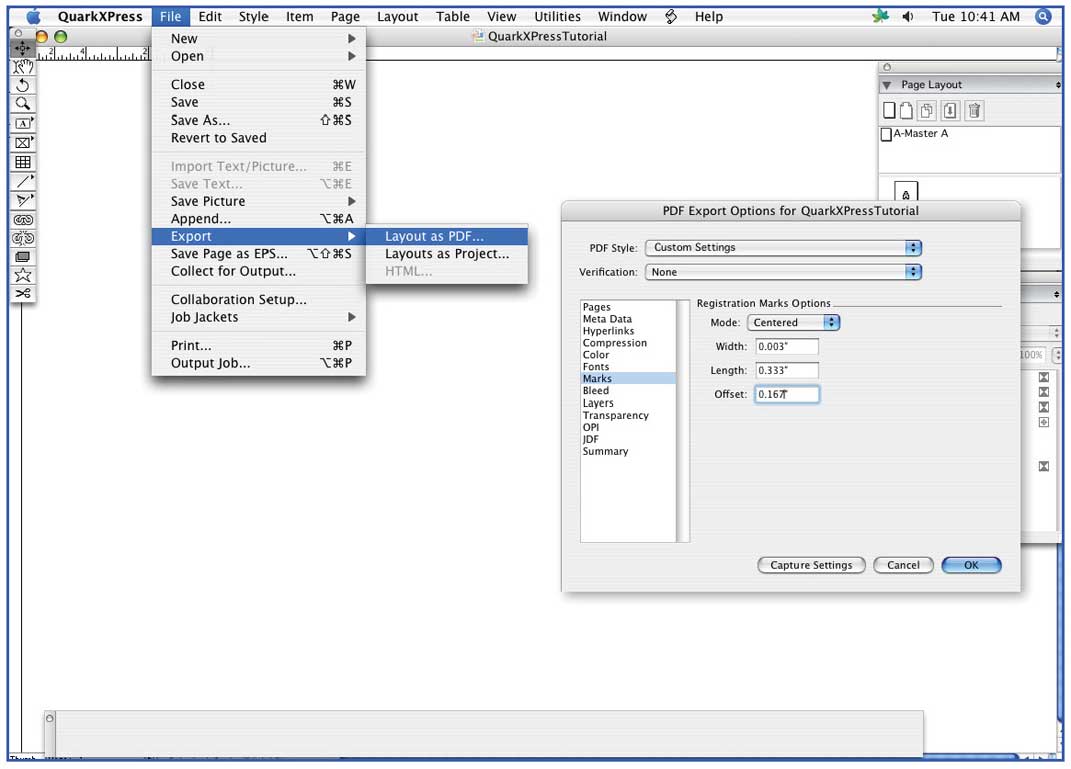
Register marks: Cross-hair lines or marks on plates, and paper that guide plate makers, pressmen, and bindery personnel in processing a print order from start to finish.
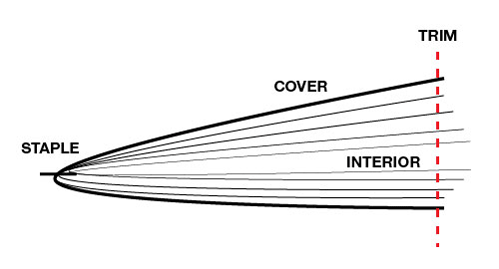
Saddle stitch: Binding a booklet or magazine with staples in the seam where it folds.
Scanner: Device used to make color separations, halftones, duo tones and tri tones. Also a device used to scan art, pictures or drawings in desktop publishing.
Score: A crease put on paper to help it fold.
Screen angles: The angles at which halftone, duo tones, tri tones, and color separation printing films are placed to make them look right.
Sheetfed Press: A printing press that runs individual sheets of paper
Side guide: The mechanical register unit on a printing press that positions a sheet from the side.
Signature: A sheet of printed pages which, when folded, become a part of a book or publication.
Spine: The binding edge of a book or publication.
Substrate: Any surface on which printing is done.
Trapping: The ability to print one ink over the other.
Trim marks: Similar to crop or register marks. These marks show where to trim the printed sheet.
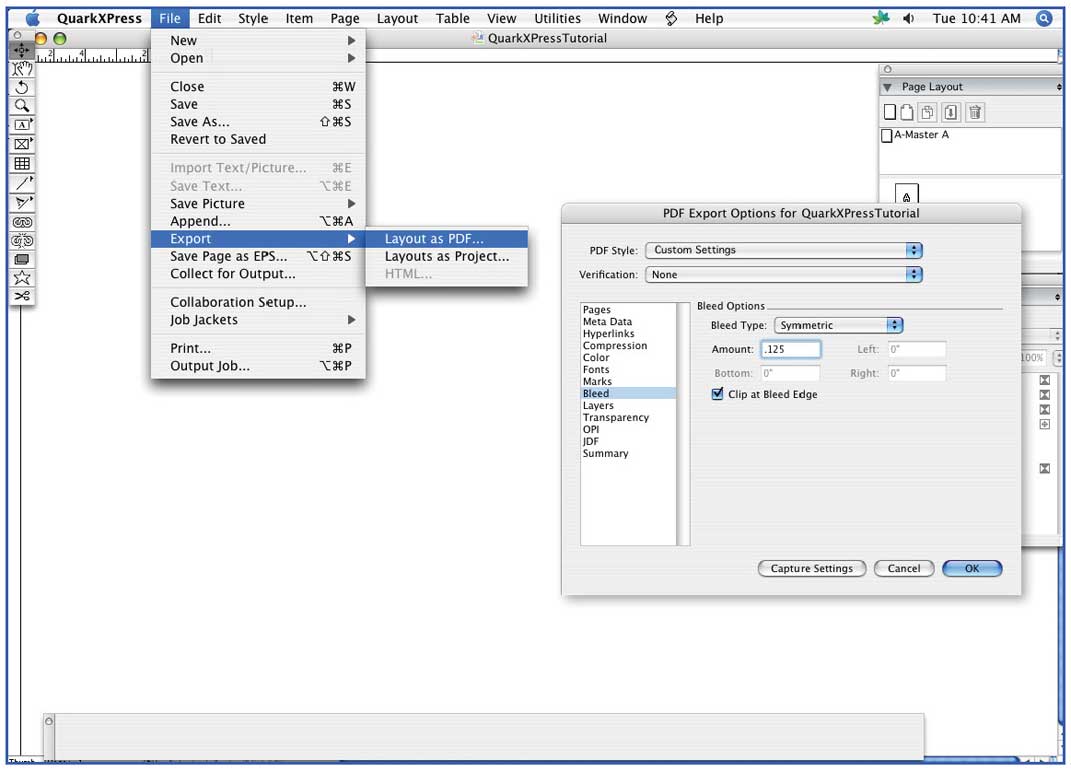
UV Coating: Applied in a similar fashion to Aqueous coating but cured with ultraviolet light. Environmentally friendly. Extremely Glossy.
Varnish: Clear ink applied to printed surfaces for looks and protection. (UV coating and aqueous coating looks better.
Virgin Fiber: Fiber that has been processed with trees harvested from the forests.
Wash-up: Removing printing ink from a press, washing the rollers and blanket. Certain ink colors require multiple wash-ups to avoid ink and chemical contamination.
Waste: A term for planned spoilage. Each operation such as printing, cutting folding, and stitching requires waste sheets to set up the machine. Between 1% and 2%.
Watermark: A distinctive design created in paper at the time of manufacture that can be easily seen by holding the paper up to a light.
Web press: The name of a type of press that prints from rolls of paper.

2. Some design tips before packaging your artwork for printing...

Naming Conventions
• Spot colors (PMS) should be named exactly the same in all page files and linked image files.
• Maintain consistent naming conventions for your files, including the folio(s).
• Periods, dashes and underscores may be used in names, but avoid using the following special characters: / \ : * ? “ < > | ( )

Page Construction
• It is best to create your document as single pages, set up as facing pages, built to their actual trim size.
• Elements that bleed off of the page must extend 1/8” over the edge of the page on all four sides. 
• Important live matter, including all type, must be a minimum of 1/4” inside the final trim to ensure that no essential information is trimmed off.
• Drill holes (wire-o or 3-hole drill) should be 3/8” from spine. Live matter should be at least 1/8” from drill holes.
• If constructing pages that will have versions, contact your Leafa Printing CSR for specifications on how to best build and supply these files.
• Avoid supplying art directly from vector art programs such as Macromedia FreeHand or Adobe Illustrator. Instead, import it into a layout program such as InDesign or QuarkXPress.


   Fonts
   Leafa Printing accepts PostScript fonts, OpenType fonts, and TrueType fonts for both Macintosh and PC. There are two options for supplying
   Leafa Printing with fonts:

1. Supply the fonts used for your job each time you submit a job to us (recommended). If we do not receive the necessary fonts to process a job, type reflows or substitutions may occur and your job may be delayed.

2. Supply a copy of your entire in-house font library. We will keep this collection on file and use it only when your files are supplied. Only new additions to your typeface library will need to be submitted when you supply your job for production.

PostScript Fonts:
Supply all screen and printer fonts used within your documents. Your library of fonts can be furnished by family, in subfolders.
Font Organization: We recommend maintaining the screen and printer font organization as it was originally provided by the font manufacturer.
Menu-Styled Fonts: On a Mac, it is best to avoid using the bold or italic style check boxes provided in the application menus. Instead use the actual font name from the font menu. For example, select “Helvetica Bold”, not “Helvetica” with the bold style checked. On a PC, be sure that the appropriate font is available in the system. For example, do not apply a bold style to the font “Wingdings” as no bold version of that font exists. Macintosh “City” Fonts (New York, Geneva, Chicago, Monaco) cannot be used in production. There are no matching printer fonts. 

Graphics and Images
The following generic file formats are supported. Whenever possible also include editable layered files so that we may modify your files if needed.
Tiff (uncompressed CMYK, 300 dpi or better at 100% of final size)
EPS (fonts converted to paths or outlines)
PDF (High-resolution, uncompressed, press-ready, all fonts embedded)
JPG (High-resolution only)

Be advised that .gif, .wmf, and .pict files are web formats and are not recommended for printing purposes.
Resolution: Color or black and white halftones should be at least twice the final output linescreen (the most common linescreen used by Leafa Printing is 200 lpi, so save tiffs at 400 dpi). Line art should be at least 600 dpi, 1200 dpi preferred. Black and white line art should be in bitmap TIFF format. 
File Type: Graphic files should be saved as .ai or .eps for vector art, art with a clipping path or a duotone. Or TIFF for CMYK, RGB or grayscale halftones.
Color Mode: Supply all images as either CMYK or grayscale high-res images. We prefer that 4-color images be saved as composite TIFF files. Any supplied RGB files will be automatically converted to CMYK by Leafa Printing RIPs.

Can I embed Pictures/Links to my page layout file? No, We highly recommend you don’t embed the pictures in your page layout file. If you embed any pictures in your page layout file, you must make sure the pictures are saved as CMYK and in Binary mode before embedding them into your page layout file.

How can I make sure that Cross-Overs are working properly? We check the cross-overs with our digital proofing system. However, it’s the designers responsibility to make sure the cross-overs are accurate before submitting the job to us.

How can I make sure that Folding lines are in correct position? To insure a proper fold, the panel that folds “in” should be (0.0625”) smaller than the other panels.

Can I use Hairlines in my artwork? No, stroke sizes less than (0.25 pts.) will not show up on our offset/digital presses.

Can I use PMS Colors in my artwork? Sure! We can handle jobs up to 6 colors on our presses in one pass, and you need to have the pictures/links for these kind of projects saved as extra channels like 5 or 6 channels. For digital jobs, the files are automatically converted in the RIP to CMYK.

What is Rich Black? For any solid black box, we need a combination of 60% Cyan, 40% Magenta, 40% Yellow and 100% Black.

What are RIPed Files? RIP stands for Raster Image Process - Jobs which have been color-separated, registered, and trapped are now ready to print with a proof. If you need any simple changes such as a typesetting, we have to delete the RIPed job, and start the process over. Changes after files have been RIPed may be  billable.

3. What is the accepted image resolution?

Resolution, also known as DPI (Dots Per Inch) or PPI (Pixels Per Inch), can be described as the number of dots that fit horizontally and vertically into a one-inch space. Generally, the more dots per inch, the more detail captured and the sharper the resulting image. We ask that all images and artwork be no less the 300DPI.

How to check the resolution in Photoshop:
To see if your file has the proper resolution for printing in Photoshop, click on Image>Image Size. View the resolution section. The resolution should be set to 300 dpi.

 How do I know if my resolution is good for print in Acrobat PDF?
To see if your file has the proper resolution in Acrobat, set your view to 300%. If your artwork appears pixelated beyond this point, then your artwork is low resolution.


If your artwork appears pixelated beyond the 300% view in Acrobat, then this is an indication that your file is low resolution. If your artwork appears crisp at 300%, then this is a good indication that your resolution is print ready.

4. What is Bleed, Cut Line and Safe Margin?

Bleeds are required in all artwork with an image extending to one of the borders. Add a quarter inch (0.125") to each side to allow for cutting. For example, for a 4” x 6” postcard with full bleed, the image size should be submitted at 4.25” x 6.25” (red box).
0.125" (1/8”) on each edge of the card will be trimmed off during the cutting process. This will leave you a 4” x 6” standard post card (black box).
Your type (text) should be 0.125" (1/8”) inside the cut box on each side. This will guarantee your text to not be cut off from your artwork (blue box).
We require a bleed area and safe margin to allow us to print and cut your printed items. A minimum of 0.125" bleed is needed with a 0.125 to 0.1875" safe area minimum.

Using border in Artwork: The cutting process for printed materials has a mechanical tolerance of about 0.0625 or 1/16 of an inch. When using a border in your artwork, it is essential that your design use at least 0.25 or 1/4 of an inch of white space from your border to the cut line to maintain a symmetric appearance. 

Correct artwork: File has bleed to outer marks. Red line is where we cut. Background will print to edge. No text is inside the safe area (marked in blue)

5. Accepted color mode, CMYK vs RGB, Rich Black and Hardcopy Proof Color Accuracy...

Color mode must be in CMYK to be a print ready file. If file(s) are submitted using any other color mode, such as RGB or Pantone, the file(s) will be converted to CMYK during preflighting for any 4 color process printing. Conversion from one color standard to another may result in a colors shift or colors dropping out. We will keep the Pantone inks for any spot color printing.
A hard copy proof is available in most of our products to view an accurate color representation of your artwork before going to press.

What is CMYK color mode?
CMYK is the color mode used by ColorDigit to reproduce your job on one of our presses. The color calibration of Cyan (C), Magenta (M), Yellow (Y), and Black (K) determines the final color in your artwork. As a result, your submitted files must be in CMYK color mode to maximize color quality.

If your files are submitted using any other color standard, such as RGB or Pantone, they will be converted to CMYK during preflighting. Conversion from one color standard to another may cause colors to shift. 
If you are not familliar with printing in CMYK color mode, we highly recomend that you order a hard copy proof, which can be selected for most Leafa Printing products. Please note that we can not guarantee that the color of your artwork printed on our presses will match that seen on your monitor or printed via any other method.

How can I guarantee color accuracy?
It is impossible to guarantee 100% color accuracy. However, you can maximize color quality by ensuring that all submitted files are in CMYK color mode and that the correct color calibration is set for the desired color match. When these four inks (collectively known as CMYK) are combined, they can produce millions of different colors. Changing the percentage (screen) of one ink can dramatically effect the color. Black (K), the fourth process ink, is often used to darken the colors created by the other three process colors CMY.

When color fidelity is critical, Leafa Printing recommends that you order a hardcopy color proof. A hardcopy color proof, which can be selected for most Leafa Printing products, is the only way to ensure the color accuracy for your print job. Our hardcopy proofer is calibrated to our offset presses, however the colors are not 100% match due to differences of two technologies.

How do I match CMYK colors?
It is always challenging to match CMYK colors 100% on paper. Mixing colors on the computer can be challenging, namely when you are trying to translate specific colors to work in a four-color printing process.

Your software program and file type impact the best way to do color matching. Software programs have different tools to do color corrections, and some programs do not have any tools for color corrections. When printing a process (CMYK) document, you should make sure all of your colors are made up of process inks. For example, one hue of green can be made by combining 100% cyan and 100% yellow, and that hue can be changed by reducing the amount of yellow or cyan, or adding small amounts of magenta or black.

When color fidelity is critical, Leafa Printing recommends that you order a hardcopy color proof. A hardcopy color proof, which can be selected for most Leafa Printing products, is the only way to ensure the color accuracy for your print job.

What if I want to create a solid black area?
When you want an area of solid black within a document, 100% black (K) will not result in a solid, saturated black. You should use rich black, which is made by mixing other colors of ink with black ink to produce a much darker, deeper black on press than can be achieved by using black ink alone. To create rich black on pieces printed by Leafa Printing, your CMYK calibration values must be 60% Cyan (C), 40% Magenta (M), 40% Yellow (Y), and 100% Black (K).
 
What if my artwork is 4/1?
Leafa Printing offers both 4/4 (color front, color back) and 4/1 (color front, black and white back).
For 4/1 layouts, the artwork file for the backside should have a CMYK calibration of C:0%, M:0%, Y:0%, and K: 10%-100% depending on the gray you desire. Please note that K:10% is a lighter gray while K:100% is the darkest gray that is not rich black.

Does lighting impact color quality?
Yes. Lighting is important since it will affect how your artwork is perceived in terms of brightness, contrast and color. Ambient lighting, while viewing a digital image file on screen, needs to be considered. A bright room tends to yield darker than expected files, especially when printed. A dark room does the opposite. As a result, we recommend that a room be darker rather than lighter, but also consistent from morning through night.

6. What is the thickness of most used paper stocks?

The following chart shows the thickness of most used paper stocks in printing industry.
To calculate the  total thickness of your printing project, please find the number of pages of your project and use the below formula to calculate the thickness of your printing project:  
Thickness of your printing project = (Paper thickness) x ( Number of pages) / 2. For example if your are designing a 120 pages book on 100# gloss book the thickness of this book is:  (120x0.005") / 2 = 0.3".

Un-coated / Offset Opaque Paper Stocks

Approx. Caliper / Thickness

50lb Offset Text Uncoated paper 0.0035"
60lb Offset Text Uncoated paper 0.004"
70lb Offset Text Uncoated paper 0.005"
80lb Offset Text Uncoated Paper 0.0055"
100lb Opaque Text Uncoated Paper 0.007"
65lb Opaque Cover Uncoated Paper 0.009"
80lb Opaque Cover Uncoated Paper 0.011" (11pt Thick)
100lb Opaque Cover Uncoated Paper 0.014" (14pt Thick)

Gloss Coated Paper Stocks

 Approx. Caliper / Thickness

70lb Gloss Book coated paper 0.0035"
80lb Gloss Book coated paper 0.004"
100lb Gloss Book coated paper 0.005"
80lb Gloss Cover Coated paper 0.0075" (7.5pt)
100lb Gloss Cover Coated paper 0.0092" (9pt)

Satin / Dull Coated Paper Stocks

Approx. Caliper / Thickness

70lb Satin or Dull Book coated paper 0.0038"
80lb Satin or Dull Book coated paper 0.0045"
100lb Satin or Dull Book coated paper 0.0055"
80lb Satin or Dull Cover Coated paper 0.0081" (8pt)
100lb Satin or Dull Cover Coated paper 0.011" (11pt) 

7. How to calculate the spine width of a perfecrt bound book?

The following chart shows the thickness of most used paper stocks in printing industry.
To calculate the spine size of your perfect bound book you have to do the following steps:
1) Find the thickness of the paper that you are going to use for inside pages of your book in the following chart:

Un-coated / Offset Opaque Paper Stocks

Approx. Caliper / Thickness

50lb Offset Text Uncoated paper 0.0035"
60lb Offset Text Uncoated paper 0.004"
70lb Offset Text Uncoated paper 0.005"
80lb Offset Text Uncoated Paper 0.0055"
100lb Opaque Text Uncoated Paper 0.007"
65lb Opaque Cover Uncoated Paper 0.009"
80lb Opaque Cover Uncoated Paper 0.011" (11pt Thick)
100lb Opaque Cover Uncoated Paper 0.014" (14pt Thick)

Gloss Coated Paper Stocks

 Approx. Caliper / Thickness

70lb Gloss Book coated paper 0.0035"
80lb Gloss Book coated paper 0.004"
100lb Gloss Book coated paper 0.005"
80lb Gloss Cover Coated paper 0.0075" (7.5pt)
100lb Gloss Cover Coated paper 0.0092" (9pt)

Satin / Dull Coated Paper Stocks

Approx. Caliper / Thickness

70lb Satin or Dull Book coated paper 0.0038"
80lb Satin or Dull Book coated paper 0.0045"
100lb Satin or Dull Book coated paper 0.0055"
80lb Satin or Dull Cover Coated paper 0.0081" (8pt)
100lb Satin or Dull Cover Coated paper 0.011" (11pt)

 
2) Spine size = (Thickness of the inside pages paper) x ( Number of sheets of the inside pages ), Please note that we are using the number of sheets in this formula which is number of pages divided by two. For example if your are designing a 120 pages book plus cover on 100# gloss book for inside pages and 100# gloss cover for cover, the spine size of the cover of this perfect bound book is:  120 Pages / 2 = 60 sheets, 60x0.005"= 0.3".


8. Is your thick book project a good fit for Saddle Stitching?

Saddle stitching is one of the most versatile and widely used binding methods available and is a common application for booklets, brochures, pamphlets, newsletters and magazines. If your project is thicker than 1/4″, you’ll need to consider an alternative bindery method.

Apply the Formula
To determine whether your thick book project qualifies for saddle stitching: Take the page count, divide it by two, then multiply that number by the caliper (thickness) of the stock. For example, an 96-page book divided by two is 48. Next, if you’re using 80lb Satin or Dull Text coated paper stock, multiply by .0045 and then add in 0.011" for the cover stock of 100# Satin or Dull Cover, so the total thickness for this example is 0.227". As long as the final number remains under 0.25", your project is a saddle stitching candidate. Please see THICKNESS OF THE POPULAR PAPER STOCKS chart.

Account for “Shingling or Creep"
Shingling, or creep, is a result of paper’s third dimension: thickness. As a saddle stitched book gets thicker, the inner pages are actually progressively narrower than the outer ones. to calculate the actual creep size, we use this formula: Number of pages divided by 4 times thickness of stock (# of pages / 4 * thickness of stock). To compensate for this “shingling” effect, the copy on each page must be moved back from the face. This is done incrementally on each successive page, and if done properly, results in an even appearance of copy placement throughout the book. Please see THICKNESS OF THE POPULAR PAPER STOCKS chart.

Chipping is Normal 
Once the book exits the stitching section of a saddle stitching production line and enters the trimmer, clamps are lowered, holding the book in place. Since the spine edge is slightly curved at the backbone, it isn’t fully supported throughout the cut. This means the trimming knives cut cleanly through the top and bottom pages, but at the backbone, where there isn’t any support, a slight tearing or “chip” occurs. This small “chip” tends to be more noticeable on thicker books than thin ones.

9. What are the Standard Pre-Converted Envelope sizes?

1) Business & Correspondence Envelopes:
Widely used for business and personal correspondence. Commercial and Side Seam flap styles are ideal for machine insertion.
Wallet flaps provide a large area ideal for imprinting. Square flaps are contemporary, but not recommended for machine insertion.


Envelope Type Size Enclosure
6 1/4 3.5" x 6" 3.25" x 5.75" 
6 3/4 3.625" x 6.5" 3.5" x 6.25"
8 5/8 3.625" x 8.625" 3.5" x 8.375"
7 3.75" x 6.75" 3.5" x 6.5"
Monarch (7 3/4) 3.875" x 7.5" 3.75" x 7.25"
9 3.875" x 8.875" 3.75" x 8.675"
9 (policy) 4" x 9" 3.75" x 8.5"
10 4.125" x 9.5" 4" x 9.25"
DL 4.313" x 8.625" 4.125" x 8.375"
11 4.5" x 10.375" 4.25" x 10.125"
12 4.75" x 11" 4.5" x 10.75"
14 5" x 11.5" 4.75" x 11.25"
16 6" x 12" 5.75" x 11.75"


2) Booklet Envelopes:
This style is ideal for annual reports, brochures, sales materials, and more. The open side makes it acceptable for automatic insertion.

Envelope Type Size Enclosure
3 4.75" x 6.5" 4.5" x 6"
4 1/2 5.5" x 7.5" 5.25" x 7"
5 5.5" x 8.125" 5.25" x 7.625"
6 5.75" x 8.875" 5.5" x 8.375"
6 1/2 6" x 9" 5.75" x 9"
6 5/8 6" x 9.5" 5.75" x 9"
6 3/4 6.5" x 9.5" 6.25" x 9"
7 1/4 7" x 10" 6.75" x 9.5"
7 1/2 7.5" x 10.5" 7.25" x 10"
9 8.75" x 11.5" 8.5" x 11"
9 1/2 9" x 12" 8.75" x 11.5"
10 9.5" x 12.625" 9.25" x 12.125"
13 10" x 13" 9.75" x 12.5"


3) Catalog Envelopes:
Center seam makes this style more durable for mailing heavy-weight materials.
These envelopes can not be processed through inserting equipment or run through a laser printer.

Envelope Type Size Enclosure
1 6" x 9" 5.75" x 8.75"
1 3/4 6.5" x 9.5" 6.25" x 9.25"
3 7" x 10" 6.75" x 9.5"
6 7.5" x 10.5" 7.25" x 10"
8 8.25" x 11.25" 8" x 10.75"
9 3/4 8.75" x 11.25" 8.5" x 10.75"
10 1/2 9" x 12" 8.75" x 11.5"
12 1/2 9.5" x 12.5" 9.25" x 12"
13 1/2 10" x 13" 9.75" x 12.5"
14 1/2 11.5" x 14.5" 11.25" x 14"
15 10" x 15" 9.75" x 14.5"
15 1/2 12" x 15.5" 11.75" x 15"


4) Square Envelopes:
This unusual shape attracts attention to contents. Square envelopes are nonstandard and require additional postage to mail.

Envelope Type Size Enclosure
5" 5" x 5" 4.75" x 4.75"
5 ½" 5.5" x 5.5" 5.25" x 5.25"
6" 6" x 6" 5.75" x 5.75"
6 ½" 6.5" x 6.5" 6.25" x 6.25"
7" 7" x 7" 6.75" x 6.75"
7 ½" 7.5" x 7.5" 7.25" x 7.25"
8" 8" x 8" 7.75" x 7.75"
8 ½" 8.5" x 8.5" 8.25" x 8.25"
9" 9" x 9" 8.75" x 8.75"
9 ½" 9.5" x 9.5" 9.25" x 9.25"
10" 10" x 10" 9.75" x 9.75"
13 ½" 13.5" x 13.5" 13.25" x 13.25"


5) Baronial Envelopes:
Deep pointed flap traditionally used for formal announcements and invitations. Not recommended for machine insertion.

Envelope Type Size Enclosure
Professional* (too small to mail) 2.125" x 3.625" 2" x 3.5"
#16 (Mrs.)* (too small to mail) 2.375" x 3.375" 2.25" x 3.125"
#17 (Mr. & Mrs.)* (too small to mail) 2.6875" x 3.6875" 2.5625" x 3.5625"
Gladstone* (too small to mail) 3.563" x 5.562" 3.375" x 5.375"
4-Bar 3.625" x 5.125" 3.475" x 4.875"
5½-Bar 4.375" x 5.75" 4.25" x 5.5"
6-Bar/Walton Outside  4.75" x 6.5" 4.625" x 6.25"
Lee 5.25" x 7.25" 5.125" x 7"
Linwood/Monona Inside 5.25"" x 7.5" 5" x 7.25"
Monona Outside 5.5" x 7.75" 5.25" x 7.5"


6) Announcement A-Style Envelopes:
This contemporary design is idea for photographs, greeting cards, small booklets, and promotional pieces.
Do not confuse the A-4 size with metric A4 paper, which fits into a DL size Commercial envelope.

Envelope Type Size Enclosure
A2 4.375" x 5.75" 4.25" x 5.5"
A4 4.25" x 6.25" 4 "x 6"
A6 4.75" x 6.5" 4.625" x 6.25"
A7 5.25" x 7.25" 5" x 7"
A8 5.5" x 8.125" 5.25" x 7.75"
A9 5.75" x 8.75" 5.5" x 8.5"
A10 6" x 9.5" 5.75" x 9.25"

10. How do I ensure my artwork is mailing-ready?

For most mailing pieces, the United States Postal Service (USPS) requires a barcode to be printed on every piece to ensure the cheapest possible postage rates. In order to do so, we ask that you provide us with at least 3.75"x2" of clear white space near the bottom right side of your printed piece to ensure that a barcode can be printed on your piece, thus ensuring the cheapest possible postal rate.

What is an indicia?
Indicia is a preprinted marking located in the upper right hand corner of each piece that will designate the piece as either first class mail or standard mail (depending on the customer's preference). The indicia shows payment of postage by the sender, and the Leafa Printing indicia must be used if Leafa Printing is handling your mailing job, unless you have your own account through the United States Postal Service.

What size should the indicia be?
For most pieces, the indicia will be approximately the size of a standard postage stamp and should be located in the upper right hand corner of the piece. The indicia shows payment of postage by the sender, and the indicia must be present if a bulk mailing rate is desired. 

How can I obtain Leafa Printing Indicia? 
You may simply send us a request and we will be gladly emailing you the right indicia based on your mailing project.

My business is a Non-Profit Organization. How do I qualify for Non-Profit rates?
Please contact our mailing specialist and they will assist you in obtaining a Non-Profit authorization number which will allow you to receive non-profit rates. The indicia must also reflect your non-profit status so please be sure and alert our staff that you will be mailing non-profit when you send us your artwork.

Does Leafa Printing offer NCOA and de-duplication?
Yes, we do have special softwares connected to USPS server that will allow us to update your mailing list with any change of address. We can also clean up your list with the removal of any duplicate records.  

How about Every Door Direct Mail (EDDM) mailing service? 
Yes, We do offer EDDM mailing service as well as pre-sorted mailing services. Please contact us and our mailing department specialist will help you to select the correct routes to achieve your mailing targets. 

What is the standard EDDM postcard size?
The most common EDDM postcard size is 6.25"x11" and 8.5"x11".

Do I need to have an Indicia for EDDM mailers?
Yes, Please contact us and we will be sending you the appropriate indicia for your EDDM postcard.

How much room should I allow for address block?
2 x 4” would accommodate standard address and barcode, so we’re in compliance with postal regulations when claiming automation rates.

Can you ink-jet address onto dark color back round or design?
It is not recommended, as the post scans the mail and if they can’t read the barcode your mail would fail and classified as non-automation, which could dramatically increase your postage.

What’s the minimum size for postcards and how heavy does the stock have to be?
The minimum size is 4 ¼ x 6” and the stock must be a minimum of 7 pt.

What’s the maximum size for standard letters and flats? 
Maximum letters / mailers in envelopes is 6 1/8 x 11 ½” Stand alone Selfmailers 5 x 10.5” and 12 x 15” for flats.

We understand that the mailing process can get quite complicated. If you have any questions at all, please feel free to contact our mailing specialist so that we can ensure that your piece meets the necessary requirements for bulk mailing before we go to print.


11. How to package and send my artwork to Leafa Printing's FTP server?

Step 1) Make a package of your artworks, either hi res press ready PDFs or native packaged files including all the used fonts and links or images. 
When collecting files for output, use “Collect for Output” in Quark, “Package” in InDesign. These features assist in gathering all placed images and fonts needed for processing. Also the report file supplies helpful information about the files.

Step 2) Create a zip file from your packaged artwork by following these steps, you can use this to compress files, folders, or both:
1) Locate the items to zip in the Mac Finder (file system)
2) Right-click on a file, folder, or files you want to zip
3) Select “Compress Items”
4) Find the newly created .zip archive in the same directory
Note: Compressing artworks on windows operating system is similar to Mac and all you need to do is Right-click on the files or folders, point to Send to, and then click on Compressed (zipped) folder. 


Step 3) Go to File Transfer - FTP page and either upload your file(s) to our server OR request for an access code to our secure dedicated FTP server if your artwork file size is bigger than 500MB.

12. Do you offer Standard product templates?

Yes, Layout guidelines are available upon request for various of products such as Business cards, Flyers, Mailing Postcards, Presentation Folders, Trifold Brochures, Gate folded Brochures, etc. Our layout guidelines are FREE, and they are so simple to use. We can provide your either PDF format or Adobe In-Design layout file so you can start your project quickly. Please feel free to contact us to discuss about your marketing project.

13. What desktop publishing applications do you accept?

Whether you want to supply press-ready PDF, native Macintosh or Windows application files, Leafa Printing can handle all of your digital pre-press needs with our state-of-the-art electronic pre-press and design services.

Leafa Printing has the latest Mac and PC hardware and a wide variety of software applications. Unlike many printers and service bureaus, we never convert PC jobs to Macintosh or convert files to a format that you are unable to use later. We keep the two most recent versions of the software listed below on our workstations, though most older versions are still supported.

Adobe Creative Cloud (CC) Applications are highly recommended for graphic design and printing industry.


We still accept QuarkXpress Application artworks. However we highly recommend you to export a high resolution press ready PDF including 0.125" bleed and crop marks and send it along with your artwork. Please feel free to contact us with any questions you may have.

  
  Microsoft Applications*
  Microsoft PowerPoint*
  Microsoft Word*
  Microsoft Excel*
  Microsoft Publisher*

*Please be aware that Microsoft applications were not designed for commercial printing and produce file formats that may have color separation and/or resolution limitations. We highly recommend you to save your Microsoft files as hi quality PDF and send it along with your artwork. Please feel free to contact us with any questions you may have.

14. How to save an Adobe InDesign Document to a Print Ready PDF?

This tutorial is designed to show the best way to save an InDesign file to a PDF, for use with our system. It will also show the best setting to save time when uploading the files to the our FTP site for printing.

Pre-Save options
:
It is always a good practice to simplify the document before saving to to PDF. This includes Flattening all transparencies and Expanding all Pantone and Spot colors to CMYK.
Flatten Transparency (Optional) will flatten all raster effects, such as drop shadows and feathered boxes and images. If this is not done lines may appear in the artwork where those effects overlap vec­tor art and placed images.
Select “Edit” and then “Transparency Flattening Preset”
1) Click “New” to make a new Preset 
2) Set Raster/Vector Balance to 100 Vectors
3) Set Line Art and Text Resolution to 2400ppi
4) Set Gradient and Mesh Resolution to 300ppi 
Check both Convert All Text to Outlines and Convert All Strokes to Outlines
 
Expand Spot Colors (Mandatory for 4color Process Jobs): PMS and other Spot colors may have undesirable color shifts when converted to CMYK. They also can cause problems when transparency effects are combined with them. For this reason it is important to expand all Pantone and Spot colors to CMYK before saving as a PDF. For best results it is best to expand each Spot swatch in the Swatches palette, however this tutorial will show how to expand all spot colors in the final Export process.
Click on the arrow on the upper right side of the Swatches palette and Select the “Ink Manager”.
On the lower right side of the Ink Manager Popup window, Check “All Spot to Process”.
Note: After exporting PDF, it is very important to check the color to be sure that any color shifts are acceptable and that all art still appears as it is intended too.
 

After the file has been prepared and simplified, now we are ready to save it as a PDF...
Step 1: Under the “File” menu choose the “Export” option. Choose a destination for you PDF and Click “Save”.

Step 2: Uncheck the “Optimize for Fast Web View” setting under “Options”. Check the “View PDF after Exporting”
Note: It is very important to review the PDF and compare to the Native document to be sure that everything translated correctly in the export.


Step 3COMPRESSION
Set Color Bitmap Images to 300ppi for images above 450ppi with the compression set to “JPEG” and the Quality set to “Maximum”
Set Grayscale Bitmap Images to 300ppi for images above 450ppi with the compression set to “JPEG” and the Quality set to “Maximum”
Set Monochrome Bitmap Images to 1200ppi for images above 1800ppi with the compression set to “CCITT Group 4”.
Note: You can also use ZIP compression because it uses non-lossy compression. It will make a larger file that will take longer to upload, but with smaller files, such as business cards and postcards, the larger size is usually minimal.
 

Step 4
MARKS AND BLEEDS
Under “Marks” check the “Trim Marks” option and leave the others unchecked. Under “Bleeds” set all four to .125 in
Note: Having less than 1/8” bleed may cause your order to have delays. 


Step 5
OUTPUT
Under the “Color” option set “Color Conversion” to “No Conversion” and set “Profile Inclusion Policy” to “Don’t Include Profile”.
Note: It is very important to be sure that your file is CMYK, before saving to PDF. It is also very impor­tant to be sure to expand all Pantone and Spot colors to CMYK before saving to PDF. Failing to do this may result in delays with your order.

Step 6: Export... 
Click on Export button,  review the exported PDF and compare to the Native document to be sure that everything translated correctly in the export. 
NOTE: We highly recommend you to click on "Save Preset..." and save the settings so you can use the same settings for all your future PDF exporting.

15. How to save a QuarkXpress Document to a Print Ready PDF?

This tutorial is designed to show the best way to save a QuarkXpress file to a PDF, for use with our system. It will also show the best setting to save time when uploading the files to the our FTP site for printing.

Step 1: Under the “File” menu choose the “Export” and “Layout as PDF... Choose a destination for you PDF and Click “Save”.

Step 2COMPRESSION
Color Images Compression:
“Automatic ZIP/JPEG High” Resolution: “Downsample to 300dpi”
Grayscale Images Compression: “Automatic ZIP/JPEG High” Resolution: “Downsample to 300dpi”
Monochrome Images Compression: “CCITT Group 4” Resolution: “Downsample to 1200dpi”


Step 3: COLOR
For 4 Color Process jobs choose:
 
Mode: Composite Setup: Composit CMYK.
For 4 Color Process Plus PMS inks jobs choose: 
Mode: Composite Setup: Composit CMYK and Spot
Note: It is very important to always export file Composite, because we go direct to plate from your files. It is also very important to send Composite CMYK without preserving Spot colors for 4 color process jobs, because many Spot colors will have color shifts when converted to CMYK.


Step 4: MARKS
Registration Marks Options Mode:
Centered Offset: 0.167 in


Step 5: BLEED
Bleed Options Bleed Type:
Symmetric Amount: 0.125 in Check “Clip at Bleed Edge”


Step 6: TRANSPARENCY
Transparency Options Transparency Flattening Resolution:
300dpi
Note: For any 4 color process jobs; It is very important to be sure that your file is CMYK before saving to PDF . It is also very impor­tant to be sure to expand all Pantone and Spot colors to CMYK before saving to PDF. Failing to do this may result in delays with your order.


Final Note: Always compare PDF to original files to be sure that all material translated correctly to PDF.

16. How to save a Corel Draw Document to a Print Ready PDF?

This tutorial is designed to show the best way to save a Corel Draw file to a PDF, for use with our system. It will also show the best setting to save time when uploading the files to the website.
Pre-Save options:
It is always a good practice to simplify the document before Publishing to PDF. This includes Flattening all transparencies. 
Flatten Transparency (Optional): The best way to insure that the quality of your images are preserved is to rasterize any artwork that uses transparencies. This will help the file translate better into the PDF. First select any image using transparency and the background art Then under the “Bitmaps” menu select “Convert to Bitmap” Next select CMYK for the “Color” option and 300dpi for the “Resolution” option and click “OK”
Note: Corel documents with transparencies often have issues when translated to a PDF. For this reason we recommend following this step to reduce the risk of having any transparency issues.

After the file has been prepared and simplified, we are ready to save it as a PDF.
Step 1:
 Under the “File” menu choose the “Publish to PDF” option. To start choose the “PDF for Prepress” setting. (We will be modifying the settings a little).


Step 2: PREPRESS
Check “Include Bleed” and set it to .125 in 
Note: Having less than 1/8” bleed may cause your order to have delays.


Step 3: OBJECTS
Set Color Bitmap Images to 300ppi with the compression set to “JPEG” and the Quality set to the
“Maximum” Set Grayscale Bitmap Images to 300ppi with the compression set to “JPEG” and the Quality set to the “Maximum”
Set Monochrome Bitmap Images to 1200ppi In the “Text and fonts” setting check “Export all text as curves”. Check “Compress text and line art”. Set the “Encoding to “Binary”.
Note: You can also use ZIP compression because it uses non-lossy compression. It will make a larger file that will take longer to upload, but with smaller files, such as business cards and postcards, the larger size is usually minimal.


Step 4: ADVANCED
Check “Preserve document overprints” Uncheck “Preserve spot colors” Uncheck “Optimized for Web” Under “Color Management” set “Output all objects as” to CMYK  Note: If there are complex patterns or fills it is a good idea to Check “Render complex fills as bitmaps”


Final Note: Always compare PDF to original files to be sure that all material translated correctly to PDF.

17. How to save a Microsoft Publisher Document to a Print Ready PDF?

This tutorial is designed to show the best way to save a Microsoft Publisher file to a press ready PDF file, for use with our system. It will also show the best setting to save time when uploading the files to the website.
Pre-Save options:
It is always a good practice to set your Publisher document to the CMYK color space. By default Pub­lisher is set to the RGB color space and there are almost always color shifts when converted to CMYK.
Changing Color Space:
Under the “Tools” menu, select “Commercial Printing Tools” and “Color Printing”. Then in the “Color Printing” window select Process colors (CMYK) from the “Define all colors as” option
Note: After changing the Color Space, take a close look at all of the artwork to be sure that any color shifts are acceptable.


Page Setup Options: 
Under the “File” menu, select “Page Setup”. Publication Type: Custom, Set the size for your document.
Note: We can better place your file into our templates, if you set your document to the correct rather than building it on an off-size.

At the top of the “Small Publication Print Options” window, select “Print one copy per sheet”.
Note: We can better place your file into our templates, if you export the PDF with only one copy per sheet.


After the file has been prepared and simplified, we are ready to save it as a PDF.
Step 1
Under the “Adobe PDF” menu, select “Change Conversion Settings”.
Application Settings:
Check “Add Links to Adobe PDF”. Uncheck “Preserve Spot Color in Adobe PDF”. Check “Print Crop Marks”. Check “Allow Bleeds. Check “Preserve Transparency in Adobe PDF”


Step 2
: ADVANCED SETTINGS ... General...

Uncheck the “Optimize for Fast Web View” setting under “Options”. Check the “View PDF after Exporting”.  Under the “Default Page Size”, set the size for your document.
Note: Adding 1” to the size here to make room for the Crop Marks.


Step 3
: COMPRESSION
Set Color Images to 300ppi for images above 450ppi with the compression set to “JPEG” and the Quality set to “Maximum”
Set Grayscale Images to 300ppi for images above 450ppi with the compression set to “JPEG” and the Quality set to “Maximum”
Set Monochrome Images to 1200ppi for images above 1800ppi with the compression set to “CCITT Group 4”.
Note: You can also use ZIP compression because it uses non-lossy compression. It will make a larger file that will take longer to upload, but with smaller files, such as business cards and postcards, the larger size is usually minimal.


Step 4: FONTS
Note: It is very important to be sure that all Fonts are imbedded. Also note that subset fonts often have problems when the file is ripped.


Step 5: COLORS
Under “Color Management Policies” set to “Leave Color Unchanged”.
Note: It is very important to be sure that your file is CMYK, before saving to PDF. It is also important to review the PDF and compare to the Native document to be sure that everything translated correctly in the export.


Step 6: SAVING AS A PRESET
Note: It is very important to be sure that your file is CMYK, before saving to PDF. It is also important to review the PDF and compare to the Native document to be sure that everything translated correctly in the export.


Step 7
: EXPORTING PDF
Under the “Adobe PDF” menu, select “Convert to Adobe PDF”


Final Note: Always compare PDF to original files to be sure that all material translated correctly to PDF.