This tutorial is designed to show the best way to save a QuarkXpress file to a PDF, for use with our system. It will also show the best setting to save time when uploading the files to the our FTP site for printing.
Step 1: Under the “File” menu choose the “Export” and “Layout as PDF... Choose a destination for you PDF and Click “Save”.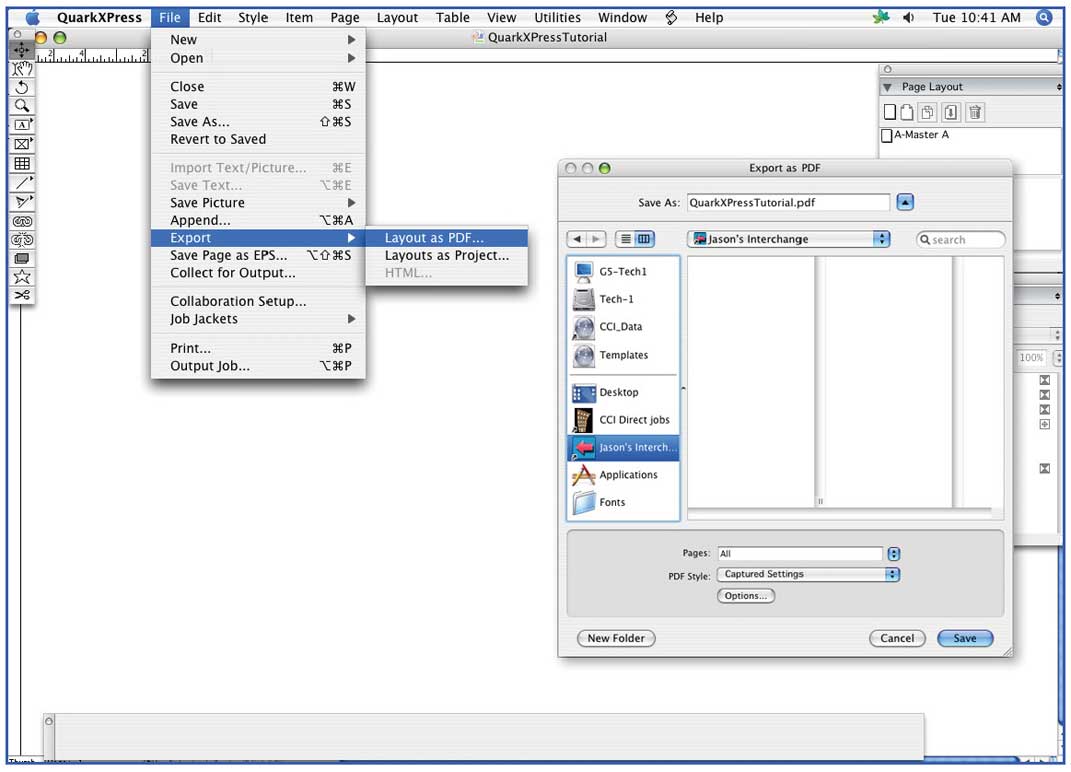
Step 2: COMPRESSION
Color Images Compression: “Automatic ZIP/JPEG High” Resolution: “Downsample to 300dpi”
Grayscale Images Compression: “Automatic ZIP/JPEG High” Resolution: “Downsample to 300dpi”
Monochrome Images Compression: “CCITT Group 4” Resolution: “Downsample to 1200dpi”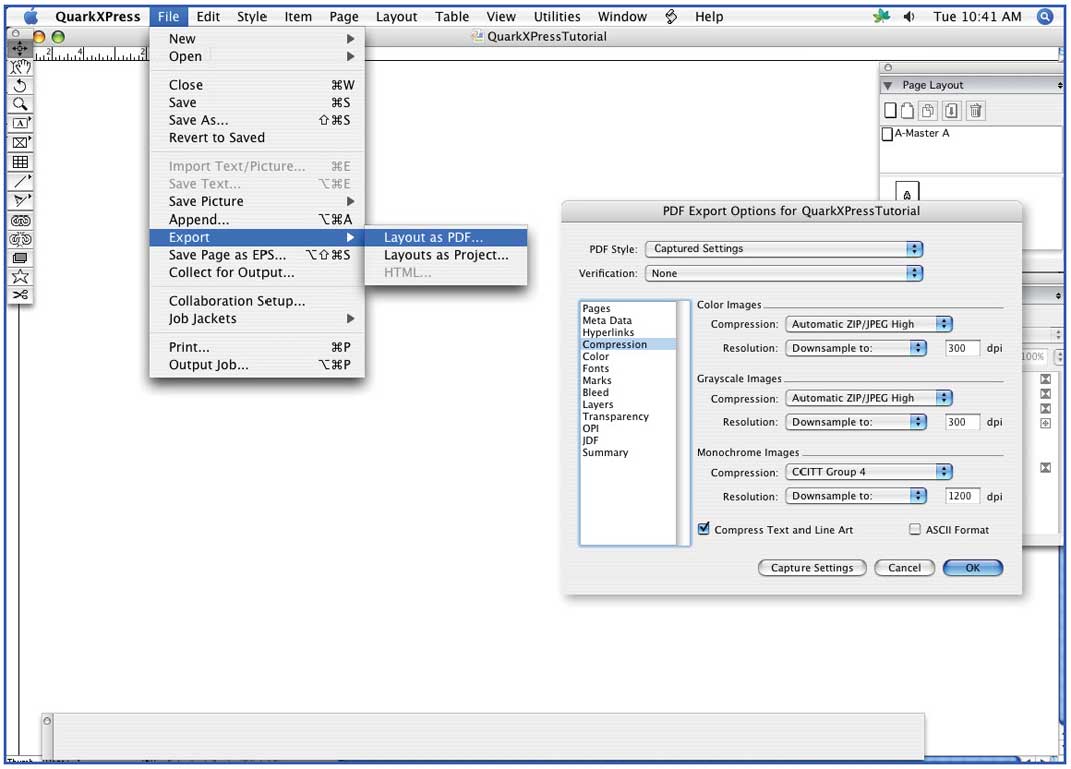
Step 3: COLOR
For 4 Color Process jobs choose:
Mode: Composite Setup: Composit CMYK.
For 4 Color Process Plus PMS inks jobs choose:
Mode: Composite Setup: Composit CMYK and Spot
Note: It is very important to always export file Composite, because we go direct to plate from your files. It is also very important to send Composite CMYK without preserving Spot colors for 4 color process jobs, because many Spot colors will have color shifts when converted to CMYK.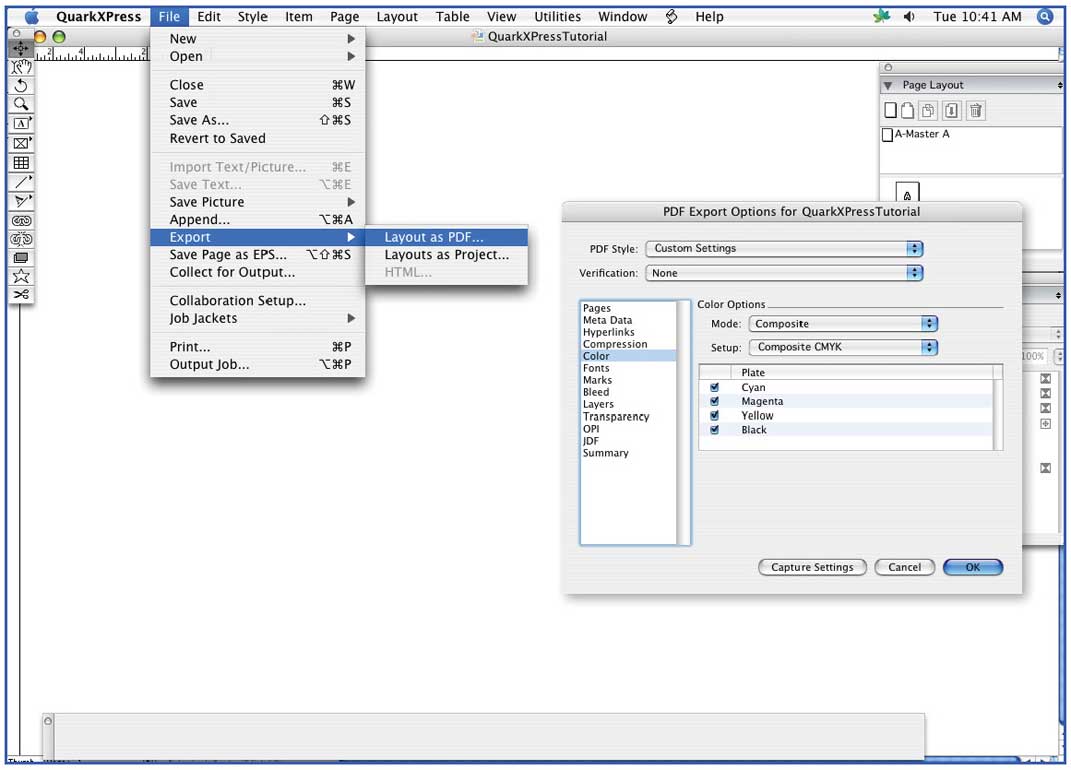
Step 4: MARKS
Registration Marks Options Mode: Centered Offset: 0.167 in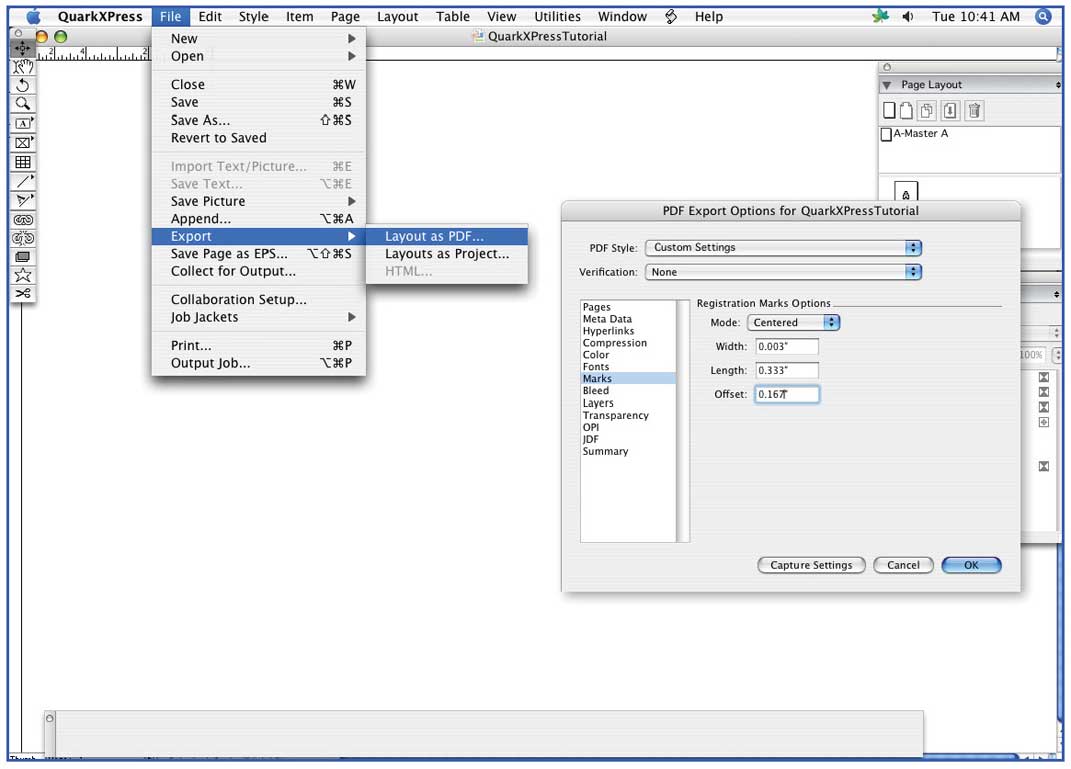
Step 5: BLEED
Bleed Options Bleed Type: Symmetric Amount: 0.125 in Check “Clip at Bleed Edge”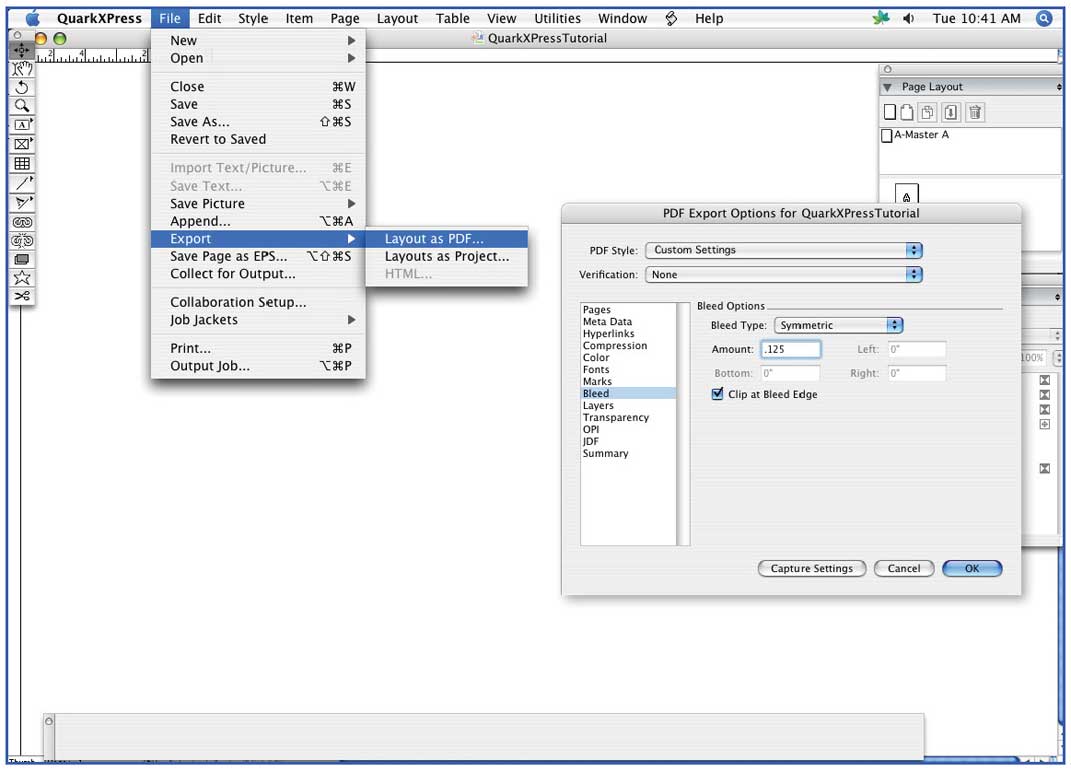
Step 6: TRANSPARENCY
Transparency Options Transparency Flattening Resolution: 300dpi
Note: For any 4 color process jobs; It is very important to be sure that your file is CMYK before saving to PDF . It is also very important to be sure to expand all Pantone and Spot colors to CMYK before saving to PDF. Failing to do this may result in delays with your order.
Final Note: Always compare PDF to original files to be sure that all material translated correctly to PDF.