This tutorial is designed to show the best way to save an InDesign file to a PDF, for use with our system. It will also show the best setting to save time when uploading the files to the our FTP site for printing.
Pre-Save options:
It is always a good practice to simplify the document before saving to to PDF. This includes Flattening all transparencies and Expanding all Pantone and Spot colors to CMYK.
Flatten Transparency (Optional) will flatten all raster effects, such as drop shadows and feathered boxes and images. If this is not done lines may appear in the artwork where those effects overlap vector art and placed images.
Select “Edit” and then “Transparency Flattening Preset”
1) Click “New” to make a new Preset
2) Set Raster/Vector Balance to 100 Vectors
3) Set Line Art and Text Resolution to 2400ppi
4) Set Gradient and Mesh Resolution to 300ppi
Check both Convert All Text to Outlines and Convert All Strokes to Outlines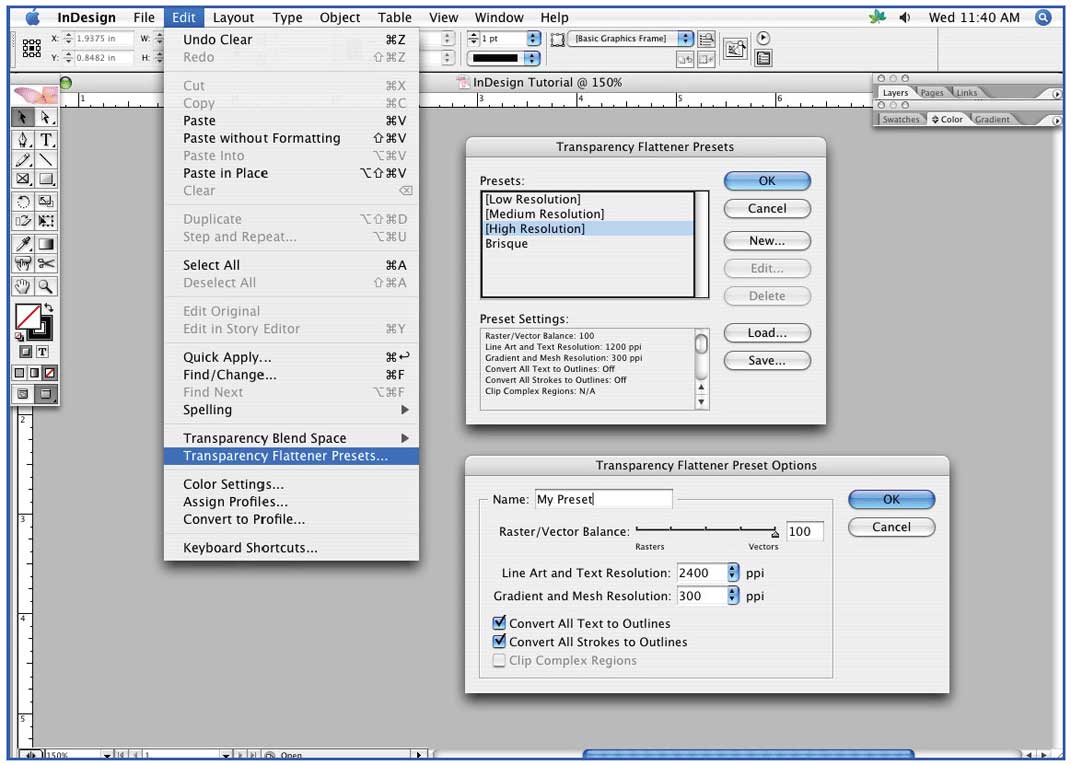
Expand Spot Colors (Mandatory for 4color Process Jobs): PMS and other Spot colors may have undesirable color shifts when converted to CMYK. They also can cause problems when transparency effects are combined with them. For this reason it is important to expand all Pantone and Spot colors to CMYK before saving as a PDF. For best results it is best to expand each Spot swatch in the Swatches palette, however this tutorial will show how to expand all spot colors in the final Export process.
Click on the arrow on the upper right side of the Swatches palette and Select the “Ink Manager”.
On the lower right side of the Ink Manager Popup window, Check “All Spot to Process”.
Note: After exporting PDF, it is very important to check the color to be sure that any color shifts are acceptable and that all art still appears as it is intended too.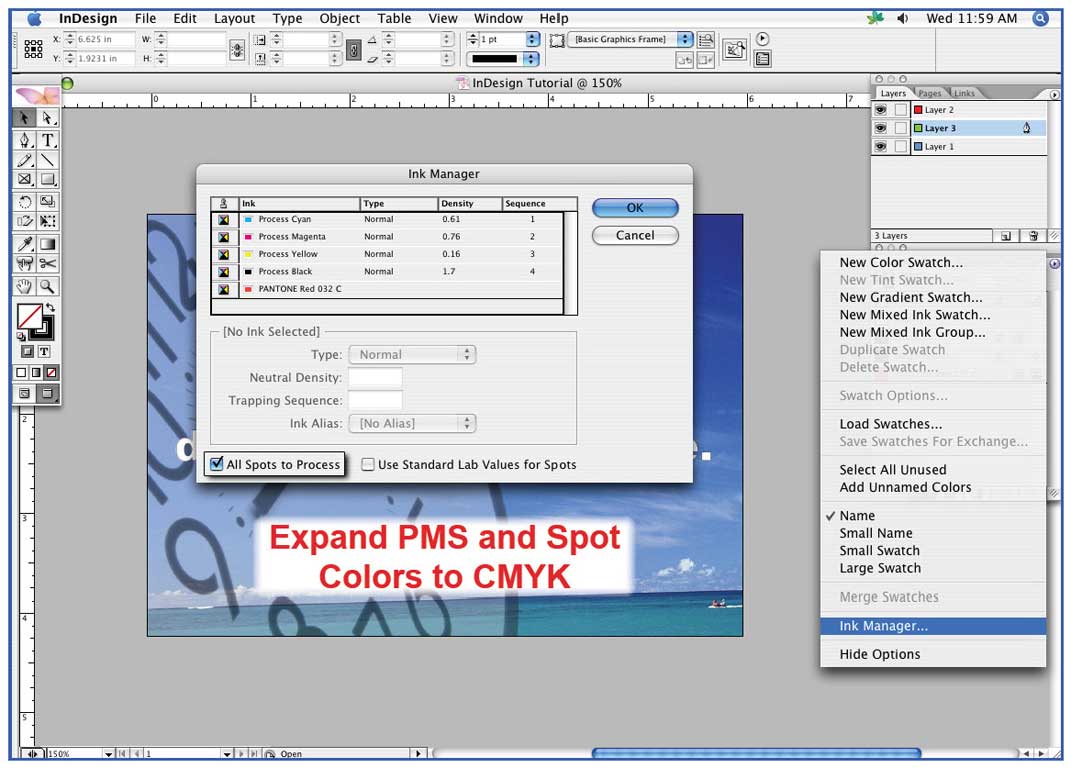
After the file has been prepared and simplified, now we are ready to save it as a PDF...
Step 1: Under the “File” menu choose the “Export” option. Choose a destination for you PDF and Click “Save”.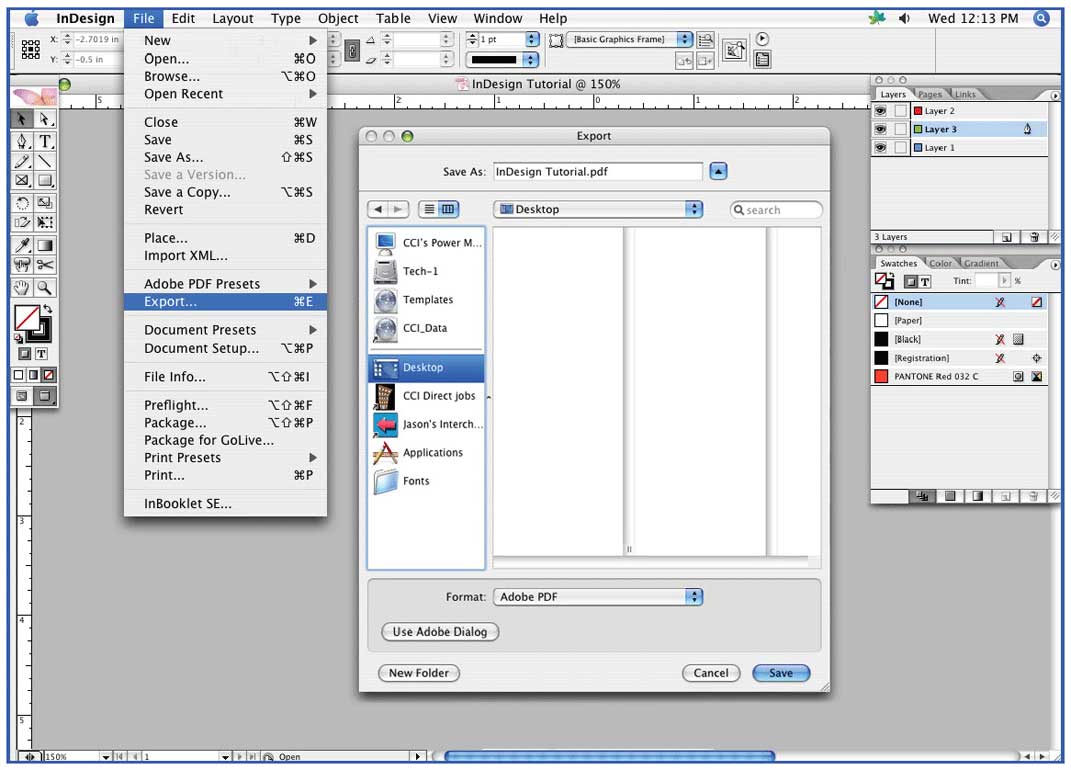
Step 2: Uncheck the “Optimize for Fast Web View” setting under “Options”. Check the “View PDF after Exporting”
Note: It is very important to review the PDF and compare to the Native document to be sure that everything translated correctly in the export.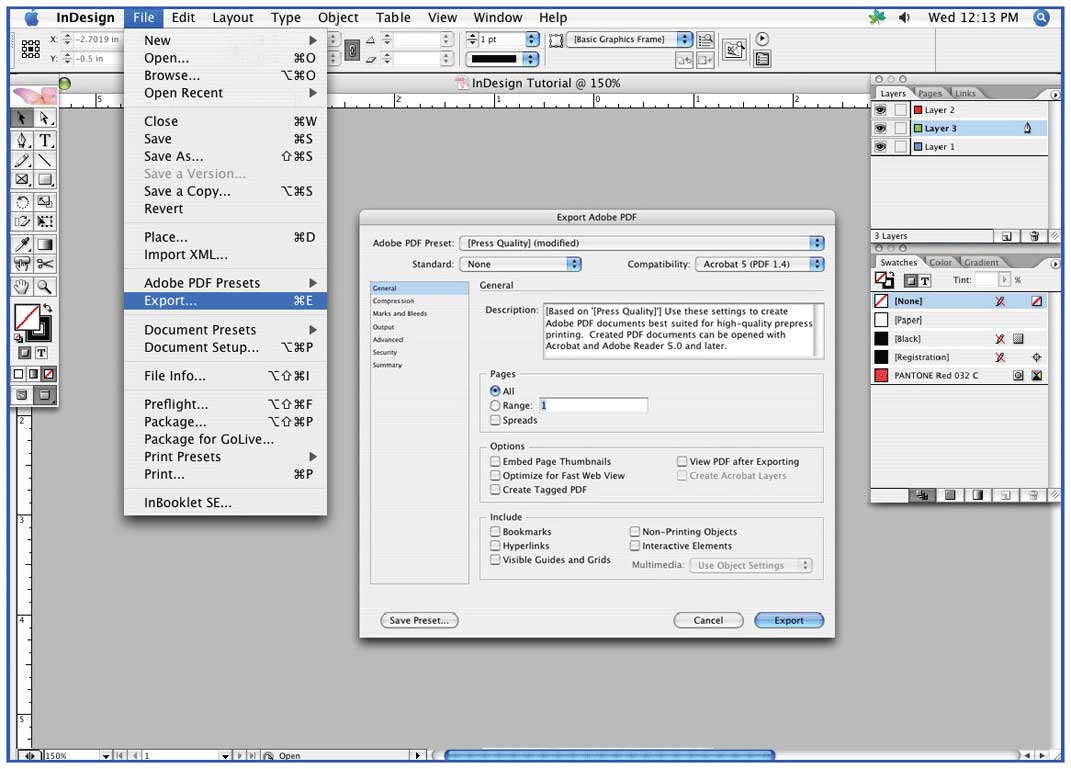
Step 3: COMPRESSION
Set Color Bitmap Images to 300ppi for images above 450ppi with the compression set to “JPEG” and the Quality set to “Maximum”
Set Grayscale Bitmap Images to 300ppi for images above 450ppi with the compression set to “JPEG” and the Quality set to “Maximum”
Set Monochrome Bitmap Images to 1200ppi for images above 1800ppi with the compression set to “CCITT Group 4”.
Note: You can also use ZIP compression because it uses non-lossy compression. It will make a larger file that will take longer to upload, but with smaller files, such as business cards and postcards, the larger size is usually minimal.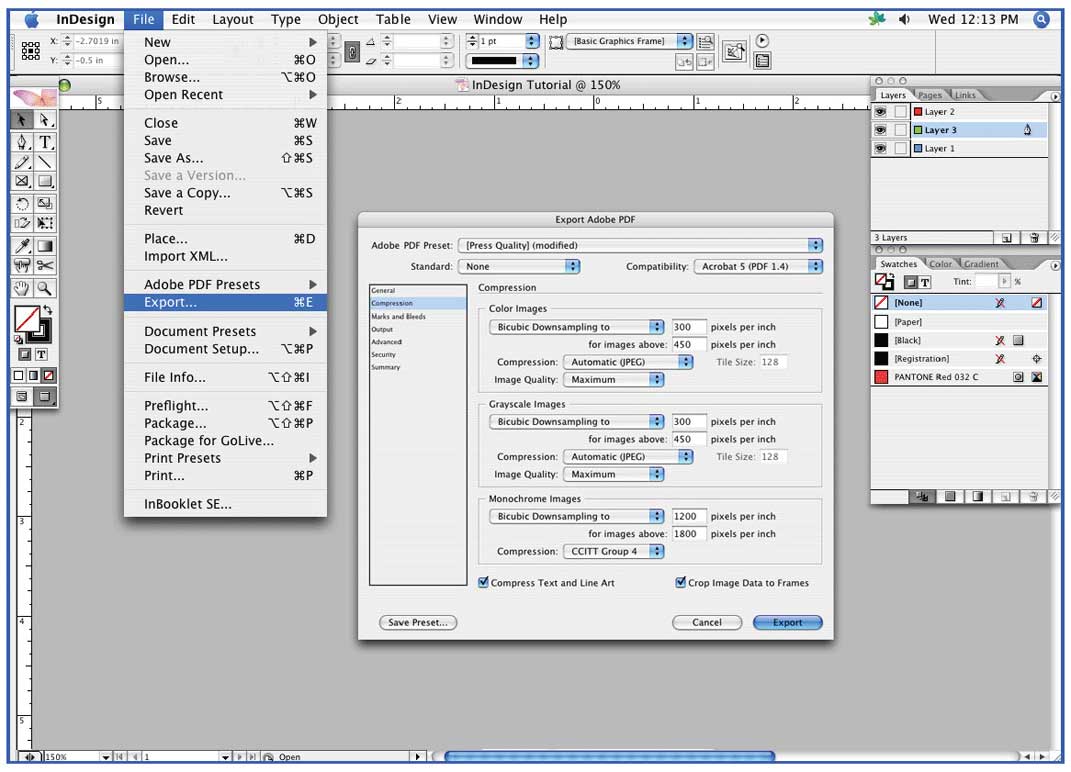
Step 4: MARKS AND BLEEDS
Under “Marks” check the “Trim Marks” option and leave the others unchecked. Under “Bleeds” set all four to .125 in
Note: Having less than 1/8” bleed may cause your order to have delays. 
Step 5: OUTPUT
Under the “Color” option set “Color Conversion” to “No Conversion” and set “Profile Inclusion Policy” to “Don’t Include Profile”.
Note: It is very important to be sure that your file is CMYK, before saving to PDF. It is also very important to be sure to expand all Pantone and Spot colors to CMYK before saving to PDF. Failing to do this may result in delays with your order.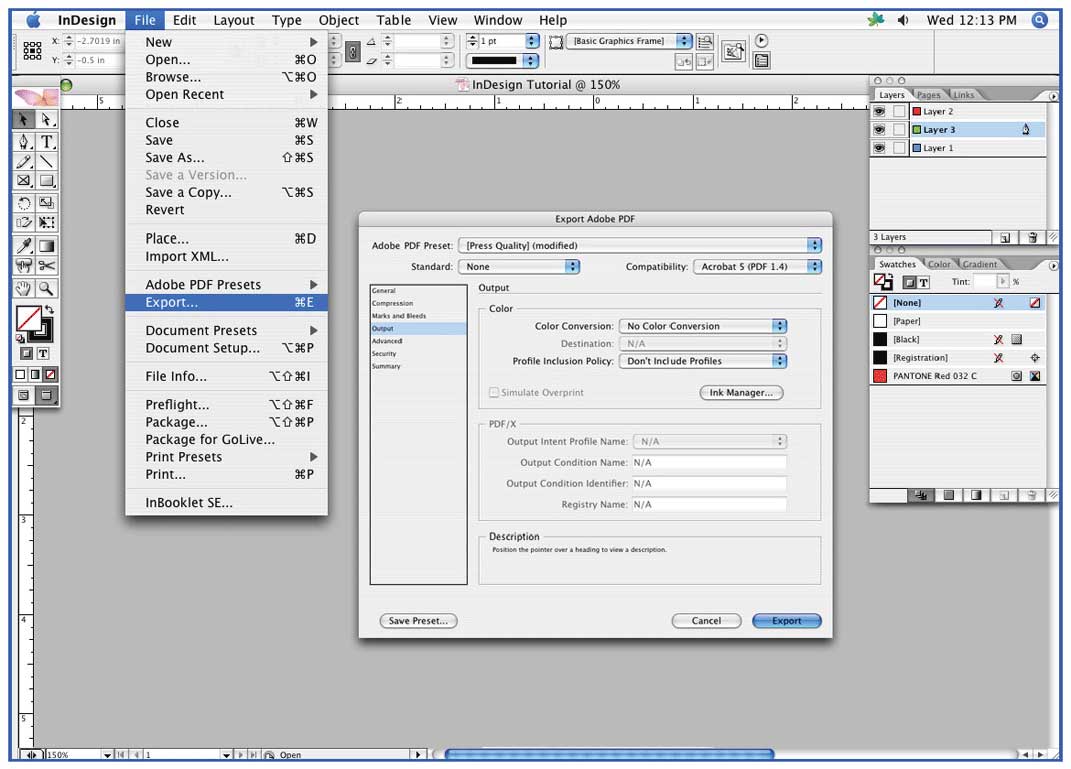
Step 6: Export...
Click on Export button, review the exported PDF and compare to the Native document to be sure that everything translated correctly in the export.
NOTE: We highly recommend you to click on "Save Preset..." and save the settings so you can use the same settings for all your future PDF exporting.