This tutorial is designed to show the best way to save a Microsoft Publisher file to a press ready PDF file, for use with our system. It will also show the best setting to save time when uploading the files to the website.
Pre-Save options:
It is always a good practice to set your Publisher document to the CMYK color space. By default Publisher is set to the RGB color space and there are almost always color shifts when converted to CMYK.
Changing Color Space:
Under the “Tools” menu, select “Commercial Printing Tools” and “Color Printing”. Then in the “Color Printing” window select Process colors (CMYK) from the “Define all colors as” option
Note: After changing the Color Space, take a close look at all of the artwork to be sure that any color shifts are acceptable.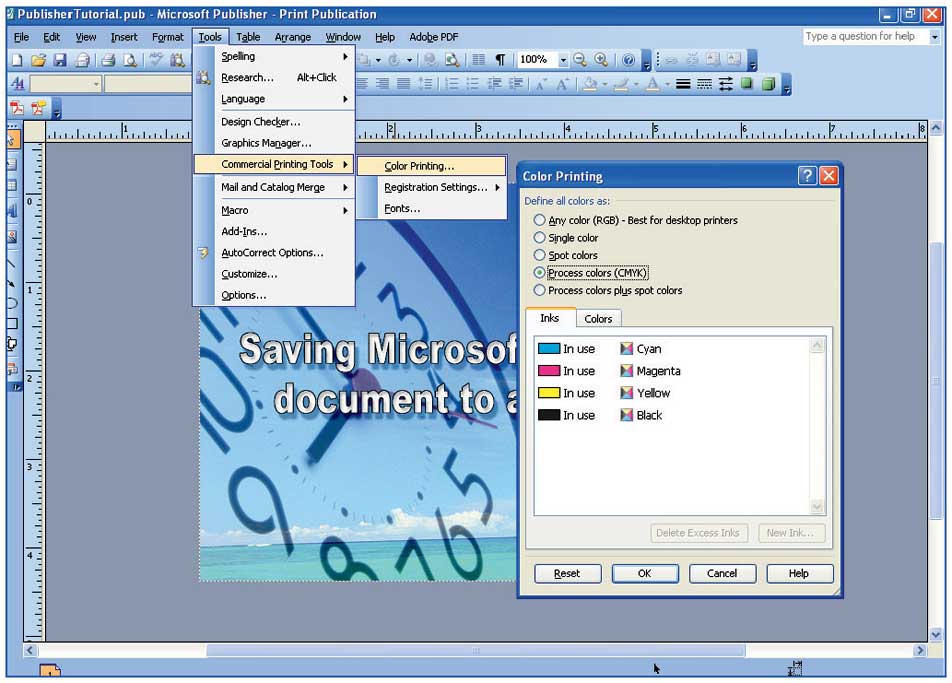
Page Setup Options:
Under the “File” menu, select “Page Setup”. Publication Type: Custom, Set the size for your document.
Note: We can better place your file into our templates, if you set your document to the correct rather than building it on an off-size.
At the top of the “Small Publication Print Options” window, select “Print one copy per sheet”.
Note: We can better place your file into our templates, if you export the PDF with only one copy per sheet.
After the file has been prepared and simplified, we are ready to save it as a PDF.
Step 1: Under the “Adobe PDF” menu, select “Change Conversion Settings”.
Application Settings:
Check “Add Links to Adobe PDF”. Uncheck “Preserve Spot Color in Adobe PDF”. Check “Print Crop Marks”. Check “Allow Bleeds. Check “Preserve Transparency in Adobe PDF”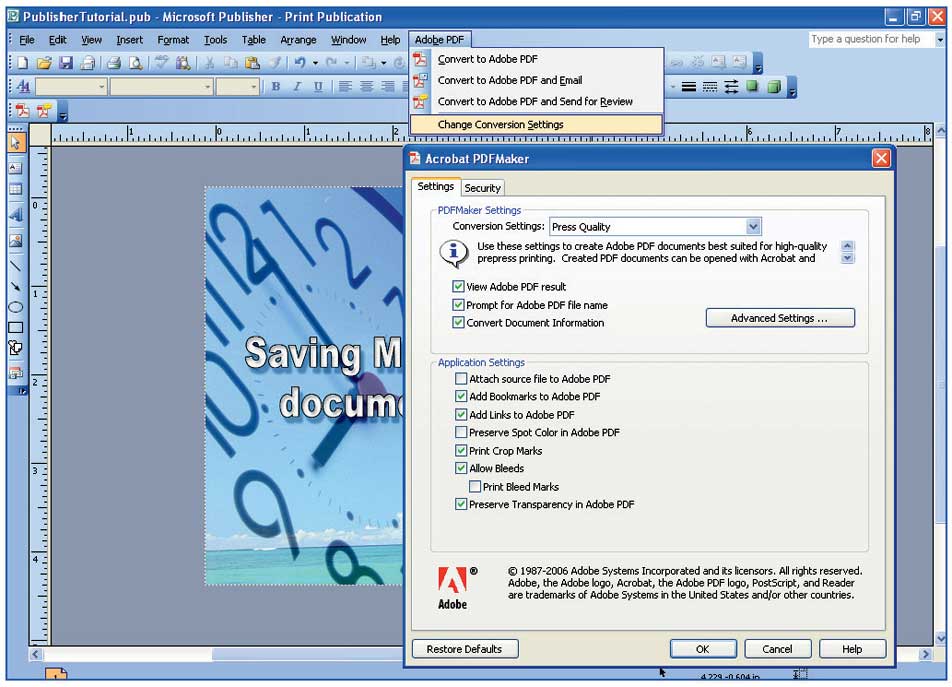
Step 2: ADVANCED SETTINGS ... General...
Uncheck the “Optimize for Fast Web View” setting under “Options”. Check the “View PDF after Exporting”. Under the “Default Page Size”, set the size for your document.
Note: Adding 1” to the size here to make room for the Crop Marks.
Step 3: COMPRESSION
Set Color Images to 300ppi for images above 450ppi with the compression set to “JPEG” and the Quality set to “Maximum”
Set Grayscale Images to 300ppi for images above 450ppi with the compression set to “JPEG” and the Quality set to “Maximum”
Set Monochrome Images to 1200ppi for images above 1800ppi with the compression set to “CCITT Group 4”.
Note: You can also use ZIP compression because it uses non-lossy compression. It will make a larger file that will take longer to upload, but with smaller files, such as business cards and postcards, the larger size is usually minimal.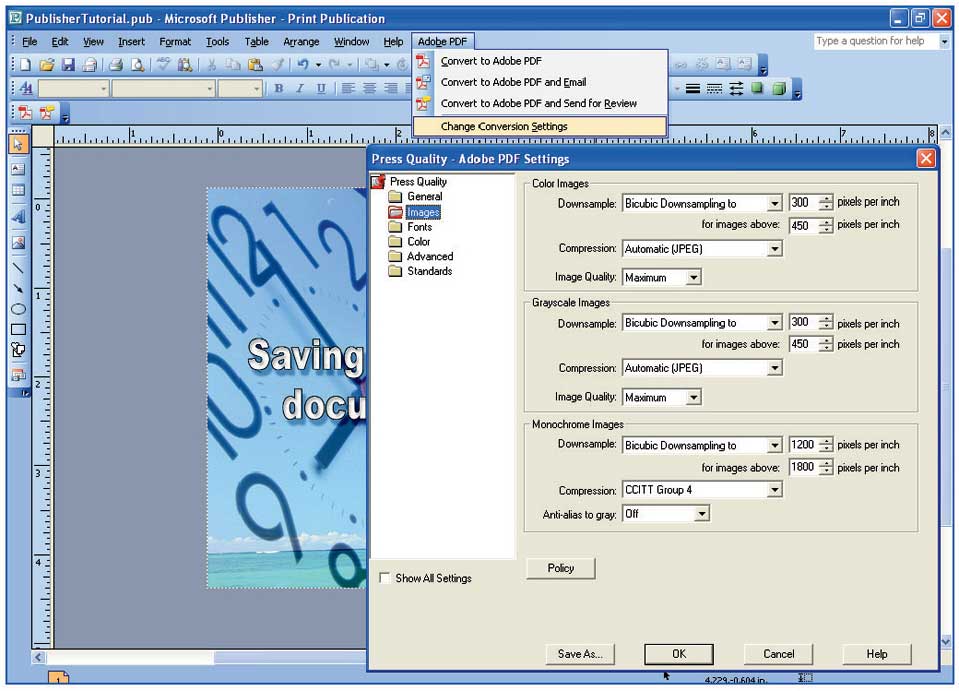
Step 4: FONTS
Note: It is very important to be sure that all Fonts are imbedded. Also note that subset fonts often have problems when the file is ripped.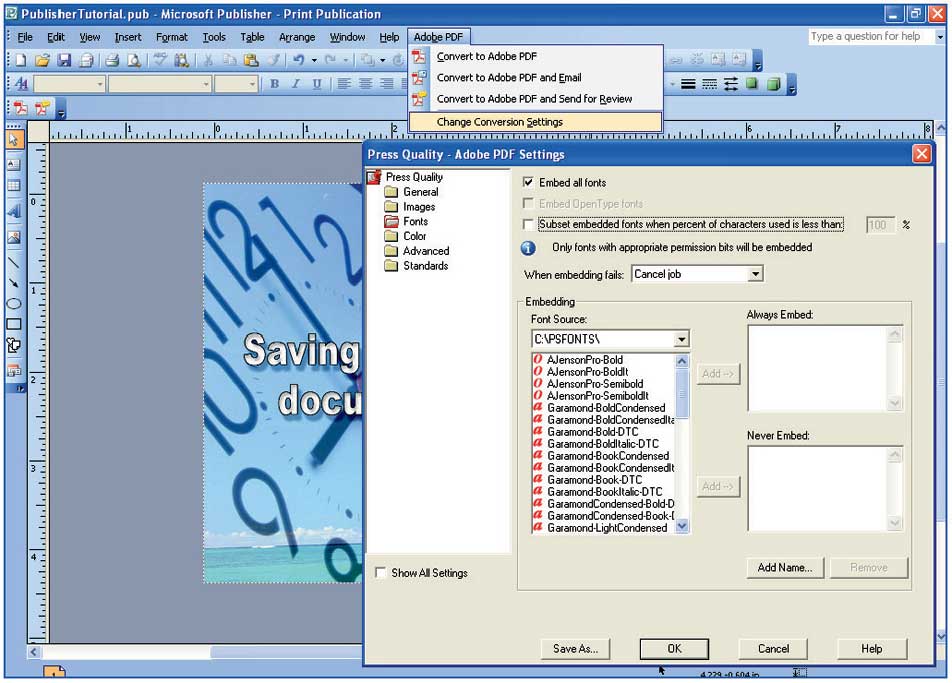
Step 5: COLORS
Under “Color Management Policies” set to “Leave Color Unchanged”.
Note: It is very important to be sure that your file is CMYK, before saving to PDF. It is also important to review the PDF and compare to the Native document to be sure that everything translated correctly in the export.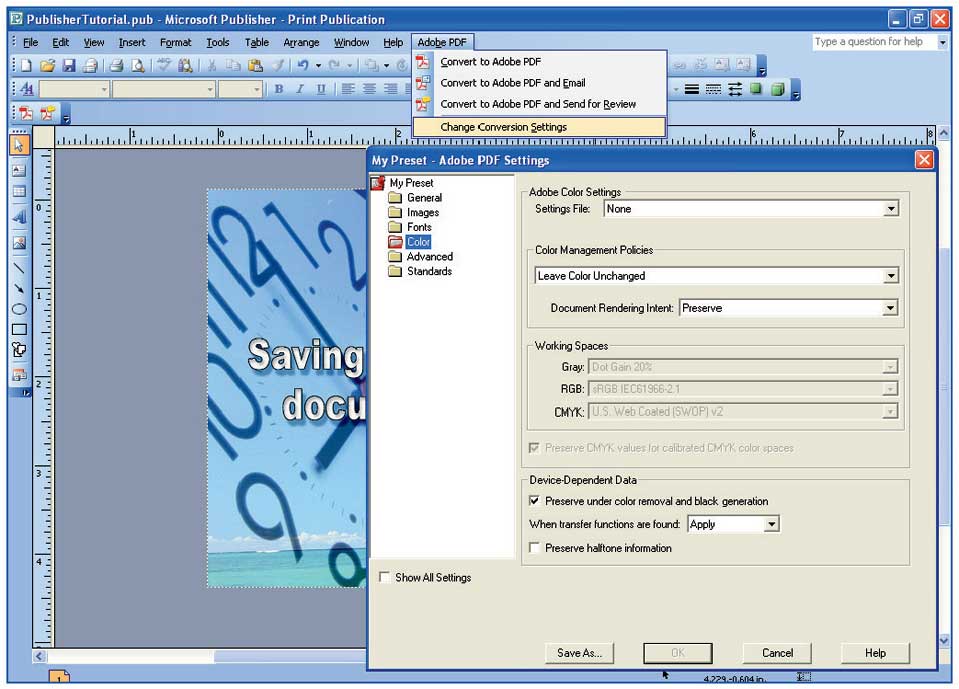
Step 6: SAVING AS A PRESET
Note: It is very important to be sure that your file is CMYK, before saving to PDF. It is also important to review the PDF and compare to the Native document to be sure that everything translated correctly in the export.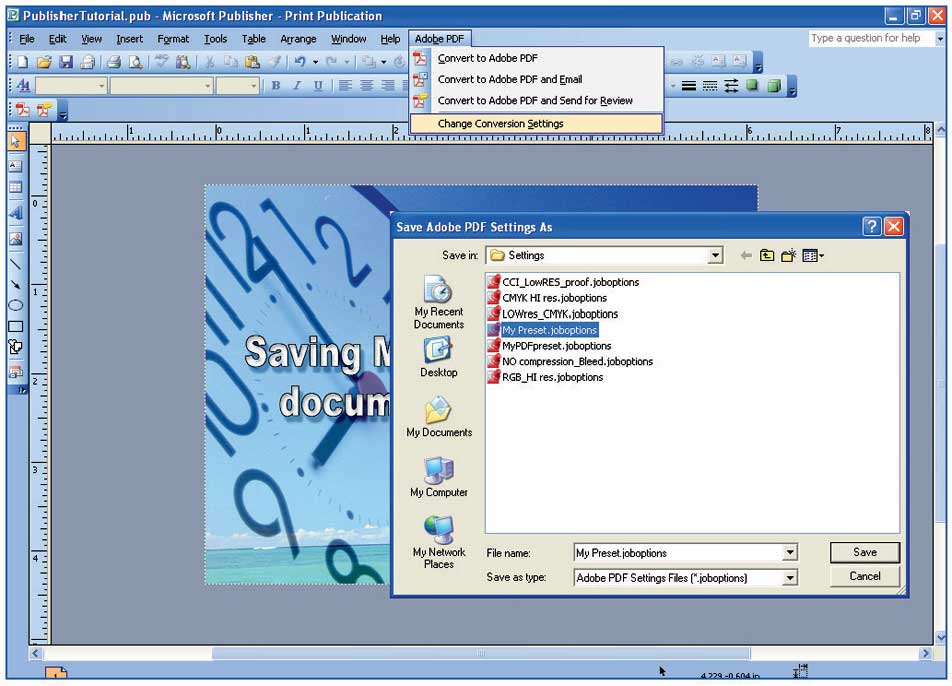
Step 7: EXPORTING PDF
Under the “Adobe PDF” menu, select “Convert to Adobe PDF”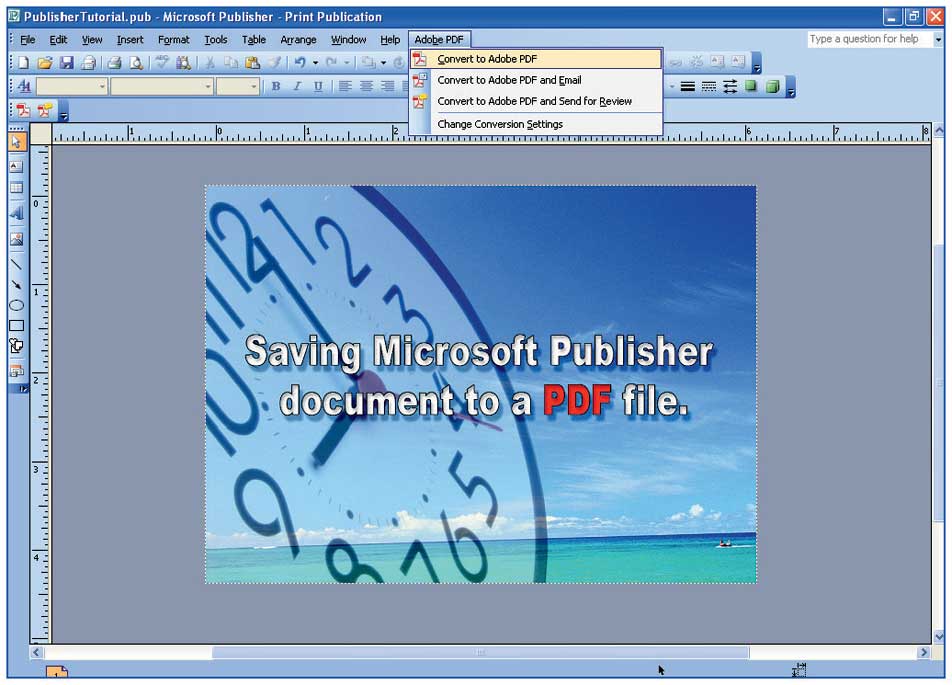
Final Note: Always compare PDF to original files to be sure that all material translated correctly to PDF.